There is no doubt that while on lockdown or stay-at-home orders during the COVID-19 pandemic, the Barrett bralette was the most sewn Madalynne pattern. It’s easy to know why – on average, it takes between 2-3 hours to make, so it is a quick project that you can whip up in a morning or an afternoon. Also, it doesn’t require a serger – all you need is a sewing machine with a straight and zig zag stitch. Plus, there’s a video tutorial on Creativebug for sewists like myself that need video in order to digest instructions.
The Barrett was released over 2 years ago, and since then, there has been a handful of questions that I have received over and over. So, in today’s blog post, I am answering them and giving 5 tips for sewing and fitting the Barrett.
Shop all Barrett bralette DIY lingerie kits!
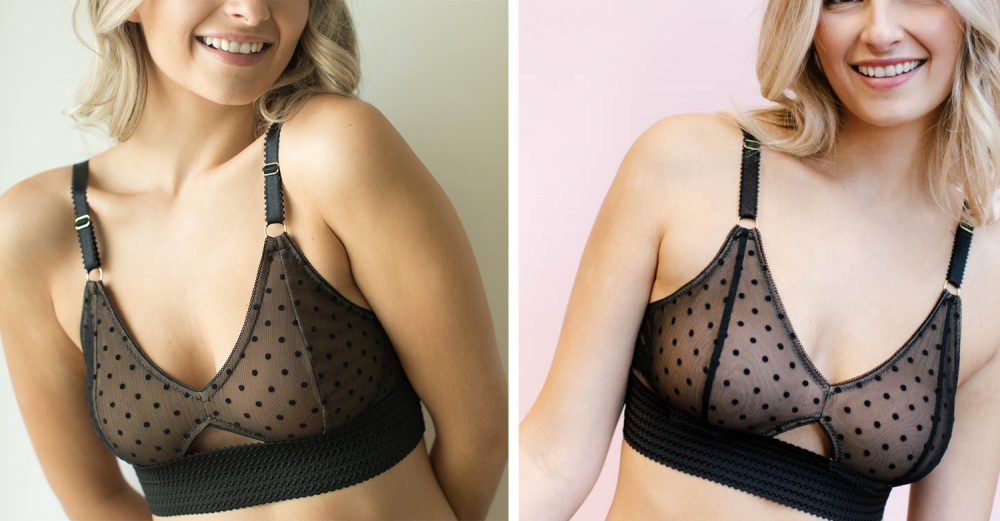
VERTICAL SEAM: Per the instructions, the vertical seams on the bra cups are clean finished, meaning the seam is sewn in a way so that the seam allowances are encased in the seam. On the interior, this gives a nicer finish, however, be careful when using sheer fabric, such as this black flock dot. If you are using this or similar fabric and sew the vertical seams per the instructions, there will be a black line visible on the exterior. See image on right below. In the image on the left, the vertical seam was sewn by placing right sides together and sewing it with a straight stitch (I have a serger and finished the seam allowances with an overlock stitch so there were not raw edges inside).
STRAP POINTS: At the strap points, it’s important to sew the picot plush elastic straight down for about 1/2″ and then curve it towards the center front or underarm. This is not obvious on the pattern, nor is it called out in the instructions. This is a matter of common sense, but I understand that you might not realize this until after the fact.
When attaching the rings, you will feed the rings through the strap point and then turn it back 1/2″ so that you can sew the bartack and secure it in place. If you sew the elastics to a point, which many have done this, you won’t be able to feed a ring through and fold it back.
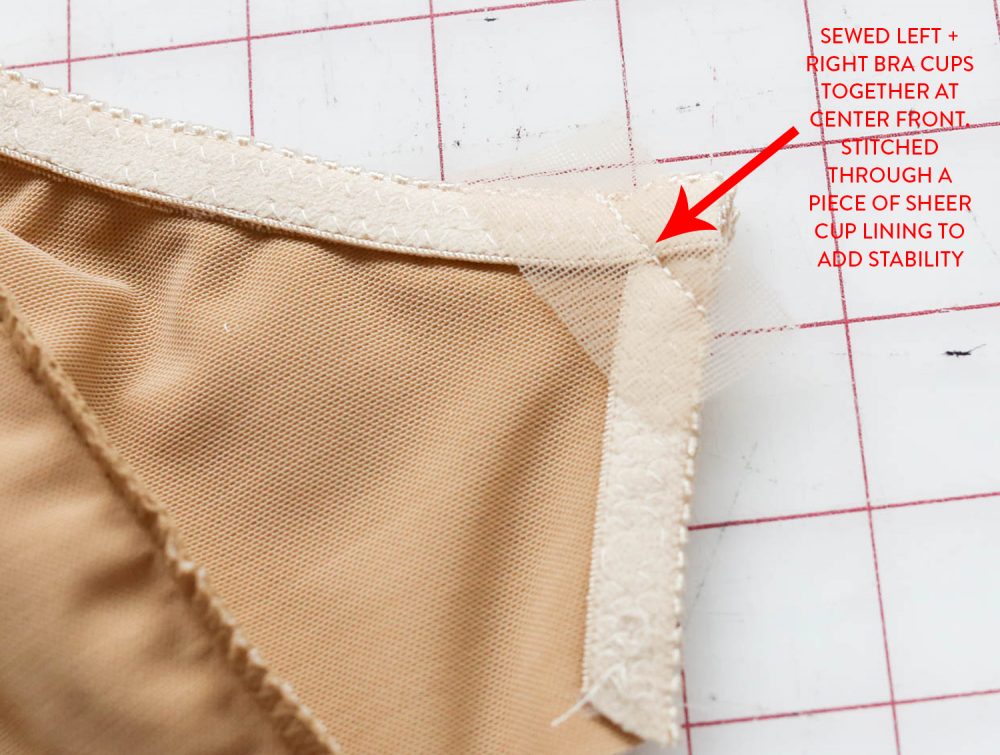
ADDING STABILITY TO THE CENTER FRONT CUTOUT: For all sizes, there is a lot of stress put on the center front seam. Here’s a SUPER helpful tip to add stability so that it doesn’t stretch out over time. Sew the picot elastic along the front neckline and cut out first, Then sew the left and right bra cups together at the center front, sewing over a piece of non stretch fabric, like sheer cup lining. This fabric is lightweight, but extremely strong, so it will ensure that the seam doesn’t stretch out while not being bulky. I trim the piece of sheer cup lining close to the stitching after.
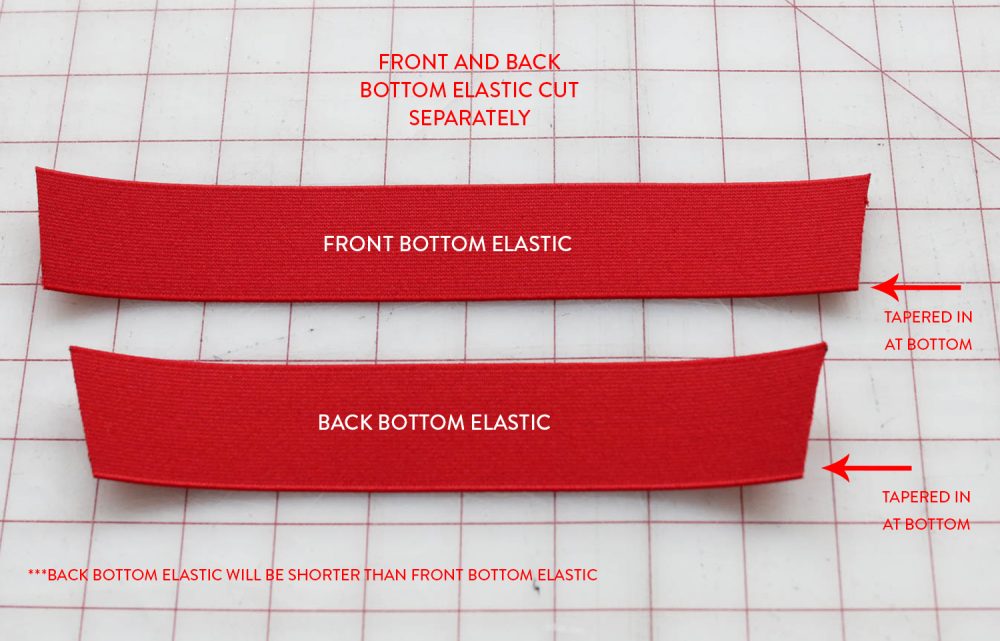
BOTTTOM BAND: If you have a small waist in comparison to your chest, I suggest cutting the bottom band into two pieces and tapering it so that it’s smaller towards the bottom (usually 1/4″). This will prevent it from standing away from your ribcage or gaping near the bottom of the bralette.
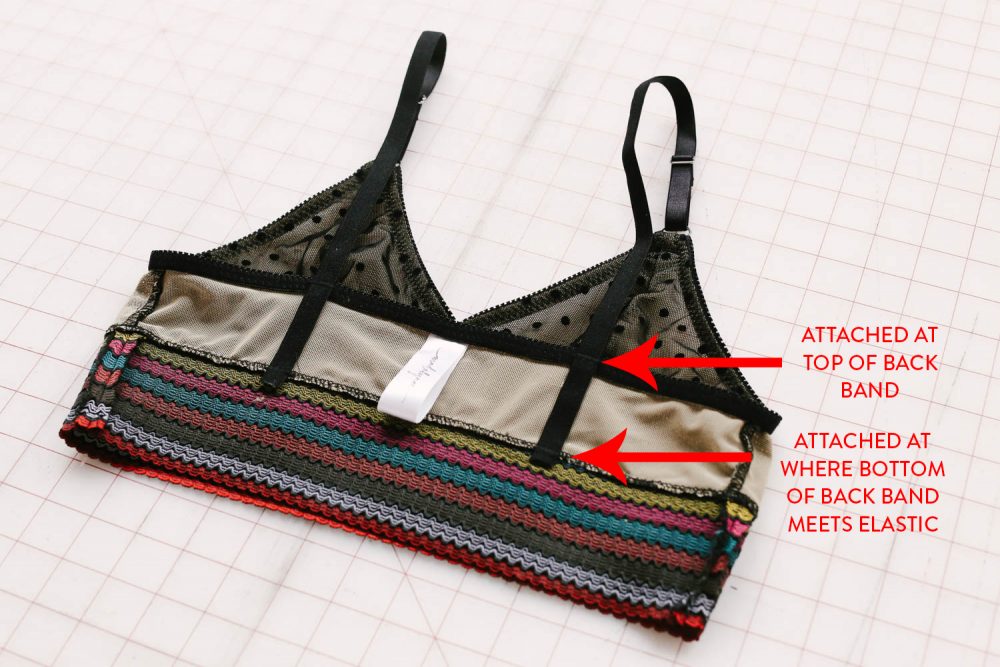
STRAP ATTACHMENT AT BACK BAND: If the strap elastics are attached once at the top of the back bralette, there will be a lot of weight put onto that one spot. This is okay for small sizes (XS-M or cup sizes A-B), but if you’re larger, I suggest attaching it a second time – where the bottom back band meets the bottom band elastic. This will help distribute the weight of the straps more evenly.

