


Common Pattern Alterations to the 8624
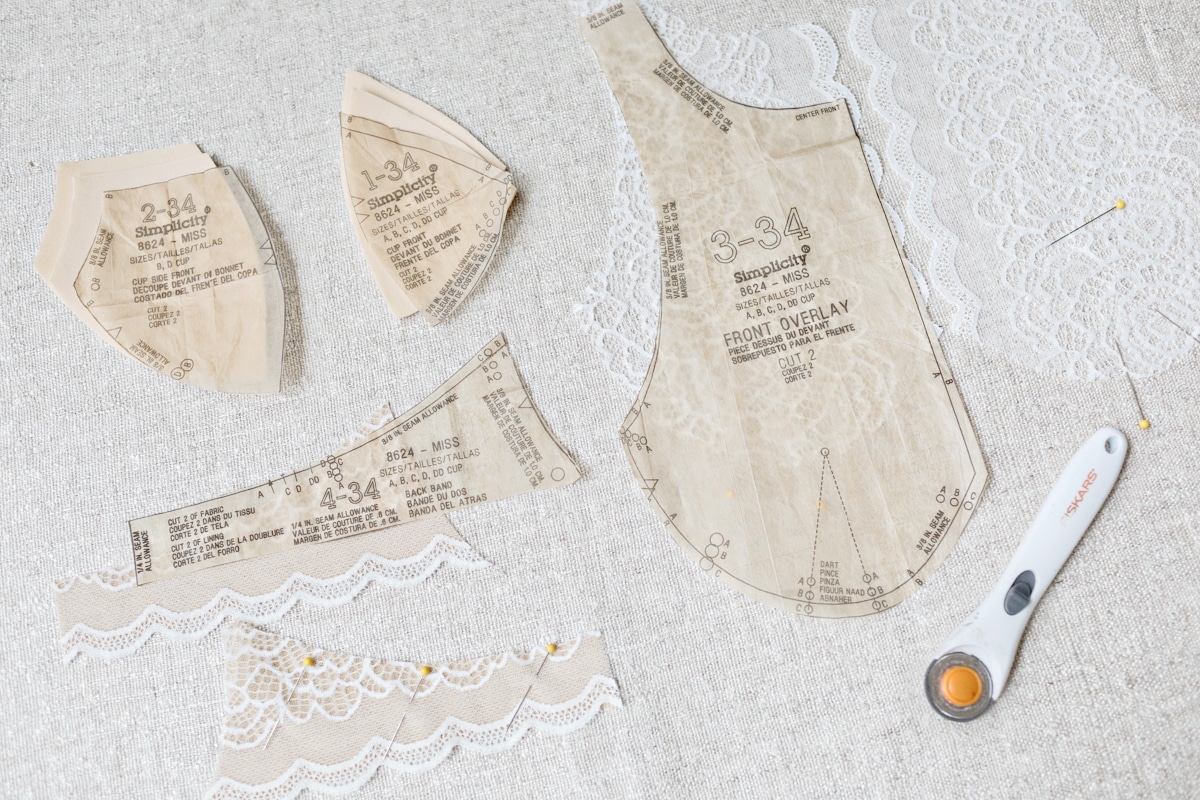 My newest pattern with Simplicity, the 8624, is the most difficult pattern I’ve released. Luckily, it doesn’t have many pattern pieces (only 5!), which means that pattern alterations are relatively easy. Today, I’m going to go over the most common alterations. If you have any other fit issues, let me know if the comments below!
Want to make an 8624? Hop on over to the web shop to purchase the pattern and the kit!
 PARTIAL BAND TO FULL BAND: First, I want to clarify that the 8624 is a partial band bra, and to change from a partial band to a full band is not a quick alteration. I wrote an entire post on this – read here – but to save you from having to click back, I’ll reiterate it here.
The pattern for a partial band bra and a full band bra are not the same, meaning you cannot sew the cups of a partial band bra into the frame of a full band bra. You also can’t decide mid-sewing to change a partial band bra to a full band bra or vice versa. In both cases, a pattern alteration is necessary. Why? Let’s look into it further.
A full band bra is a bra in which the cups are sewn into a frame, and a partial band bra is a bra in which there is no frame and the band and the bridge are separate pieces. For the 8624, the bridge is a simple strap elastic. For both styles, the wire line sits at the base of the breast, but the direction in which the seam allowances are “pushed” is different depending on the style. To understand this better, let’s walk through the construction of each. On a partial band bra, the cup seam allowances, which are usually ¼”, are stitched to channeling, which is usually 3/8” (edge to edge, not the internal width). After the channeling has been attached, it is flipped to the INSIDE of the cup and stitched a second time. On a full band bra, the seam allowances, which are the same width as in a partial band, are also stitched to 3/8” wide channeling. After the channeling has been sewn, it is then flipped OUTSIDE of the cup and stitched a second time. So, briefly put, the cups for a partial band bra are bigger than the cups for a full band bra to account for the channeling being flipped inside rather than outside. Here’s another way of saying it – a partial band has an extra 3/8” built into the pattern to account for the channeling being flipped to the inside of the cup.
Now, if you are up for making that pattern alteration, read further in that post I linked to. I give a demo.
NECK WIDTH: It’s easy to spot if the neck width is too small – the straps will sit too close to the neck. To increase, you’re going to shift the front overlay pattern to the left. For this tutorial, I’m going to increase the neck width 1/4″. After, trace new neck shape, but keep the shape of the rest of the pattern. Essentially, you only want to change the neck portion, but keep the shape of the rest of the front overlay pattern. If you want to reduce the neck width, you’d do the opposite (shift the front overlay pattern the right).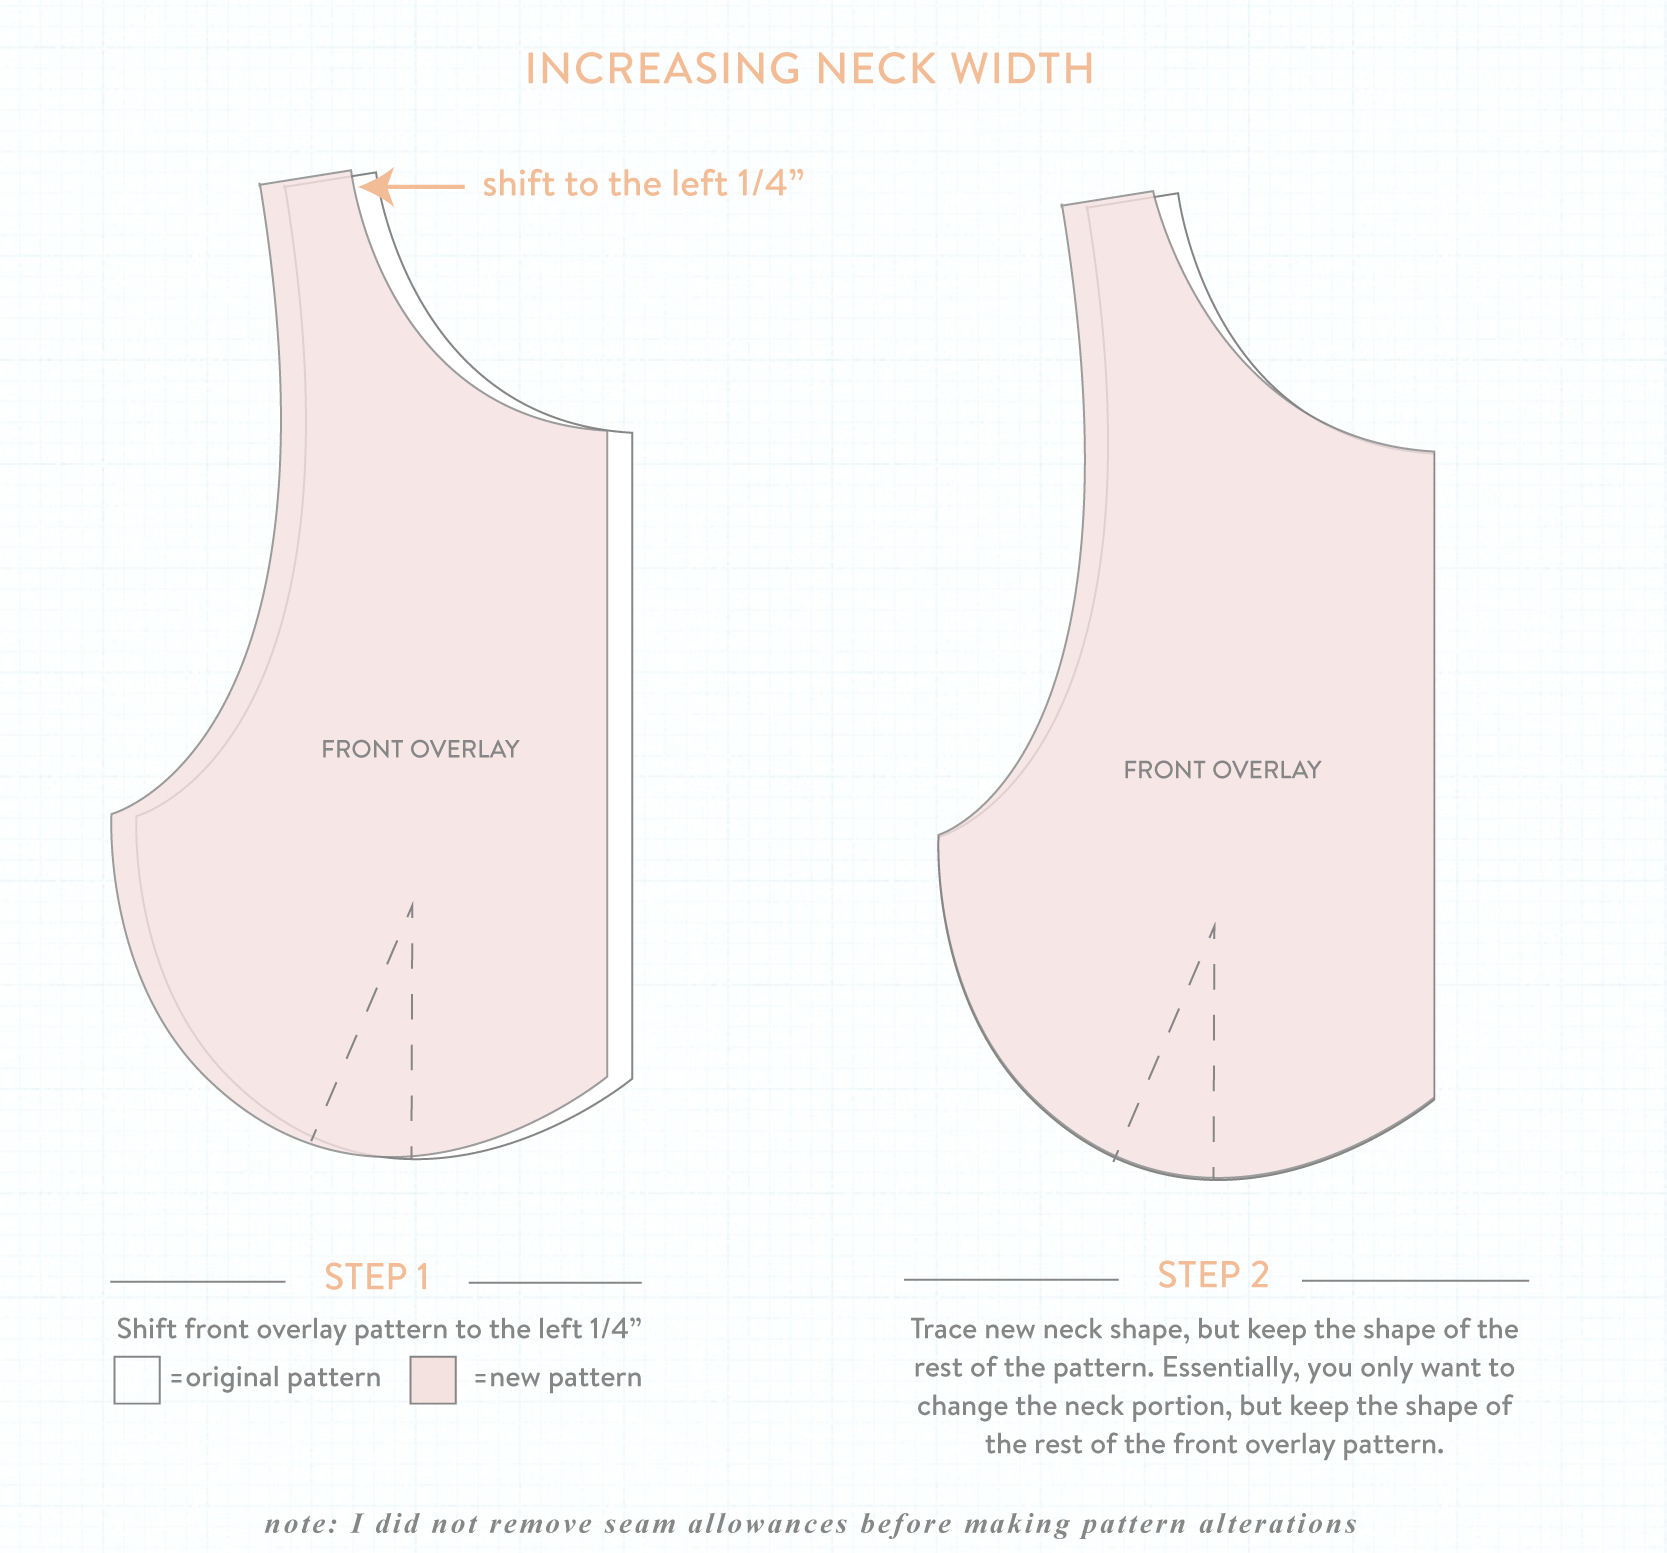
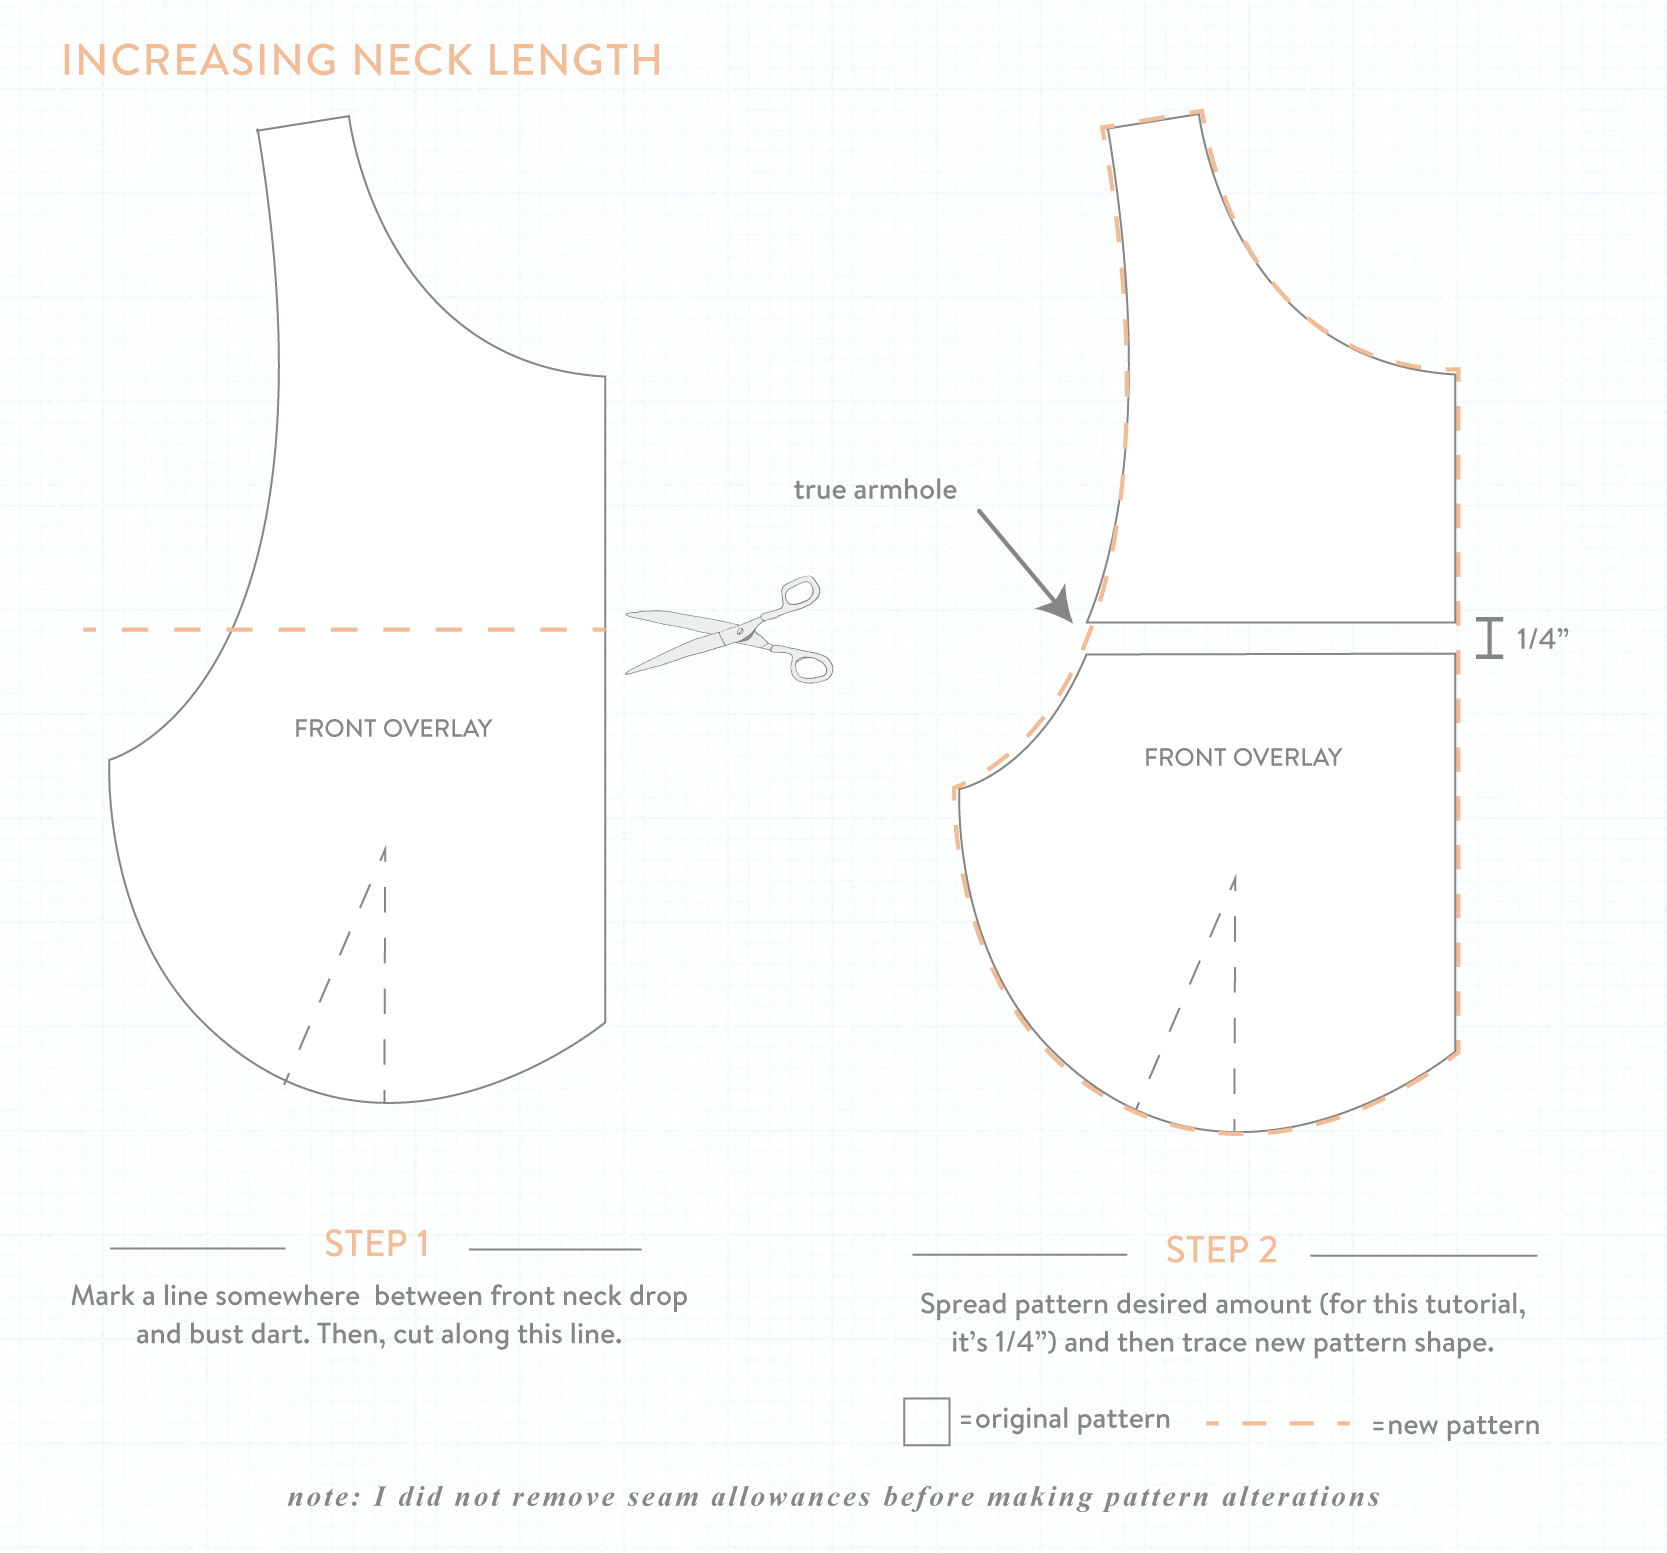
NECK LENGTH: I have long legs, but am petite on top. Usually, I have to reduce the neck width and the armhole/torso length. For the 8624, I have to reduce the neck length about 1/2″ in order for it to fit. The alteration isn’t hard. Super easy actually. First, mark a line somewhere between front neck drop and bust dart. Then, cut along this line. After, spread the pattern the desired amount and trace the new front overlay. If you want to reduce the neck length, then you would do the opposite – instead of slashing and opening, you’d slash and close.
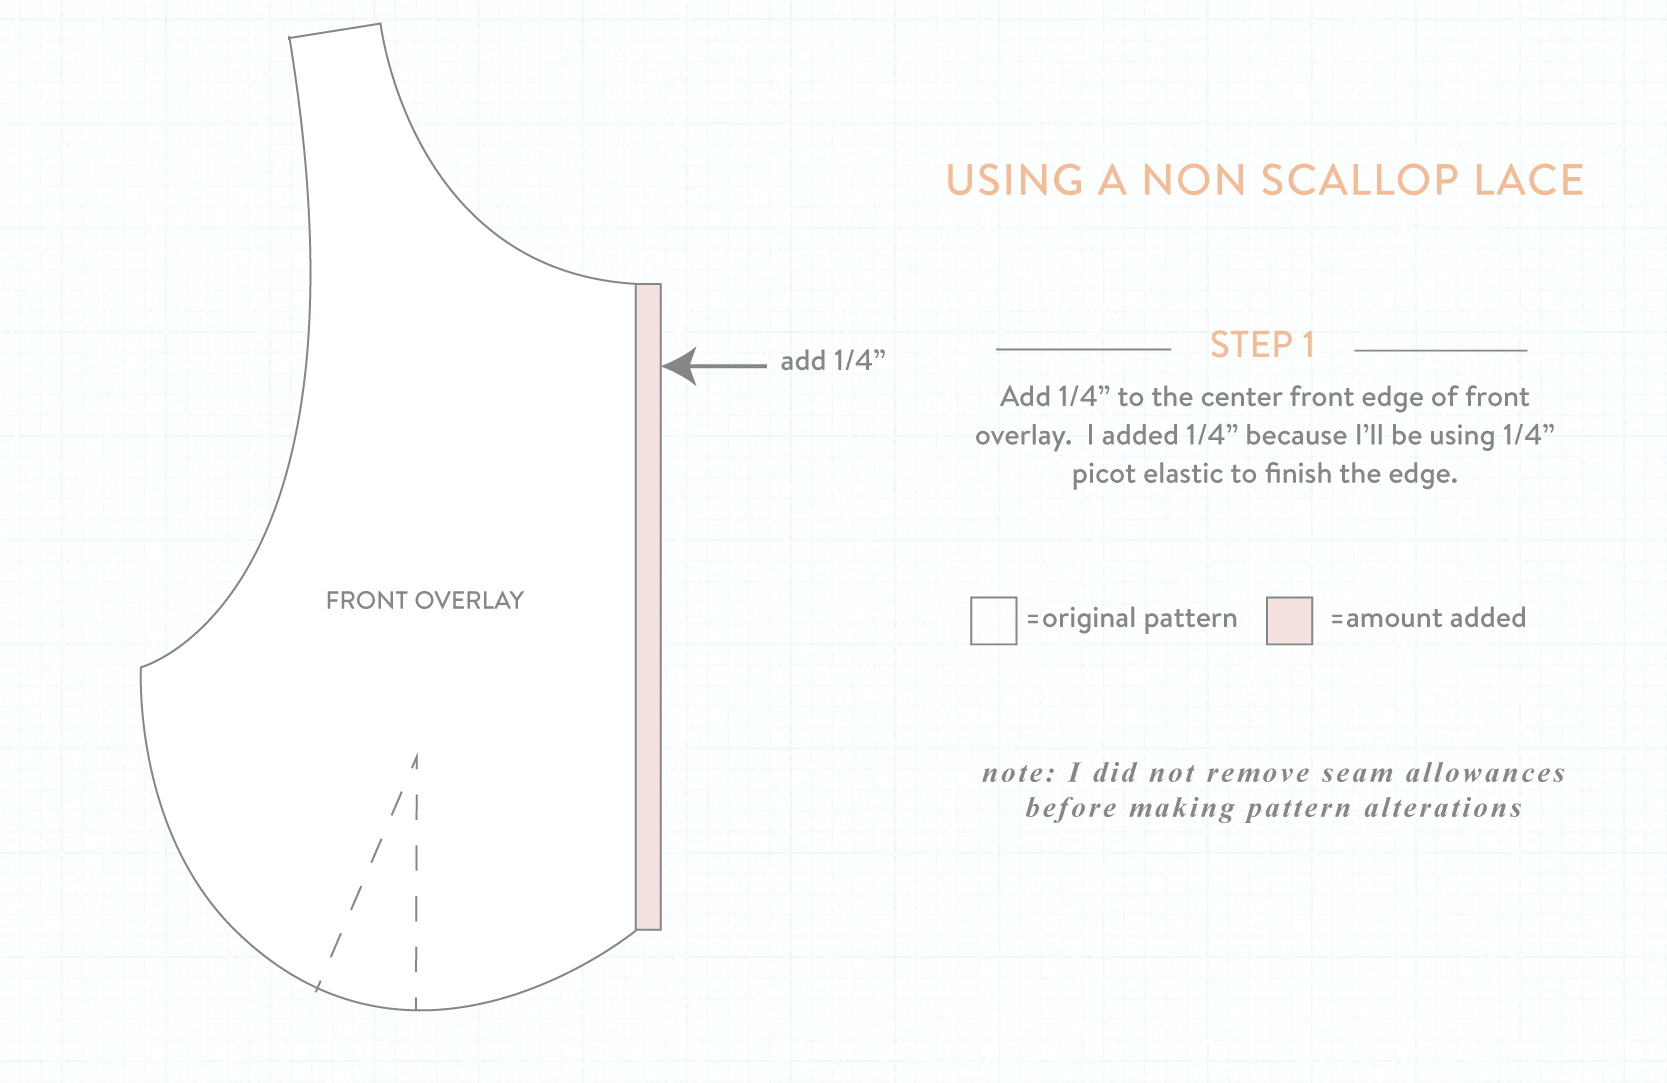
USING A NON SCALLOP LACE: The pattern calls for a scallop lace to be used for the front overlay. If you want to use a non scallop lace, you will have to finish the center front edge with an elastic. If using a picot elastic – the width of the elastic is the amount that you have to add. So, if using a 1/4″ picot elastic, then add 1/4″ to the center front edge. Same goes for 3/8″ and 1/2″. If you want to use a foldover elastic to finish the center front edge, then you don’t need to adjust the pattern at all.
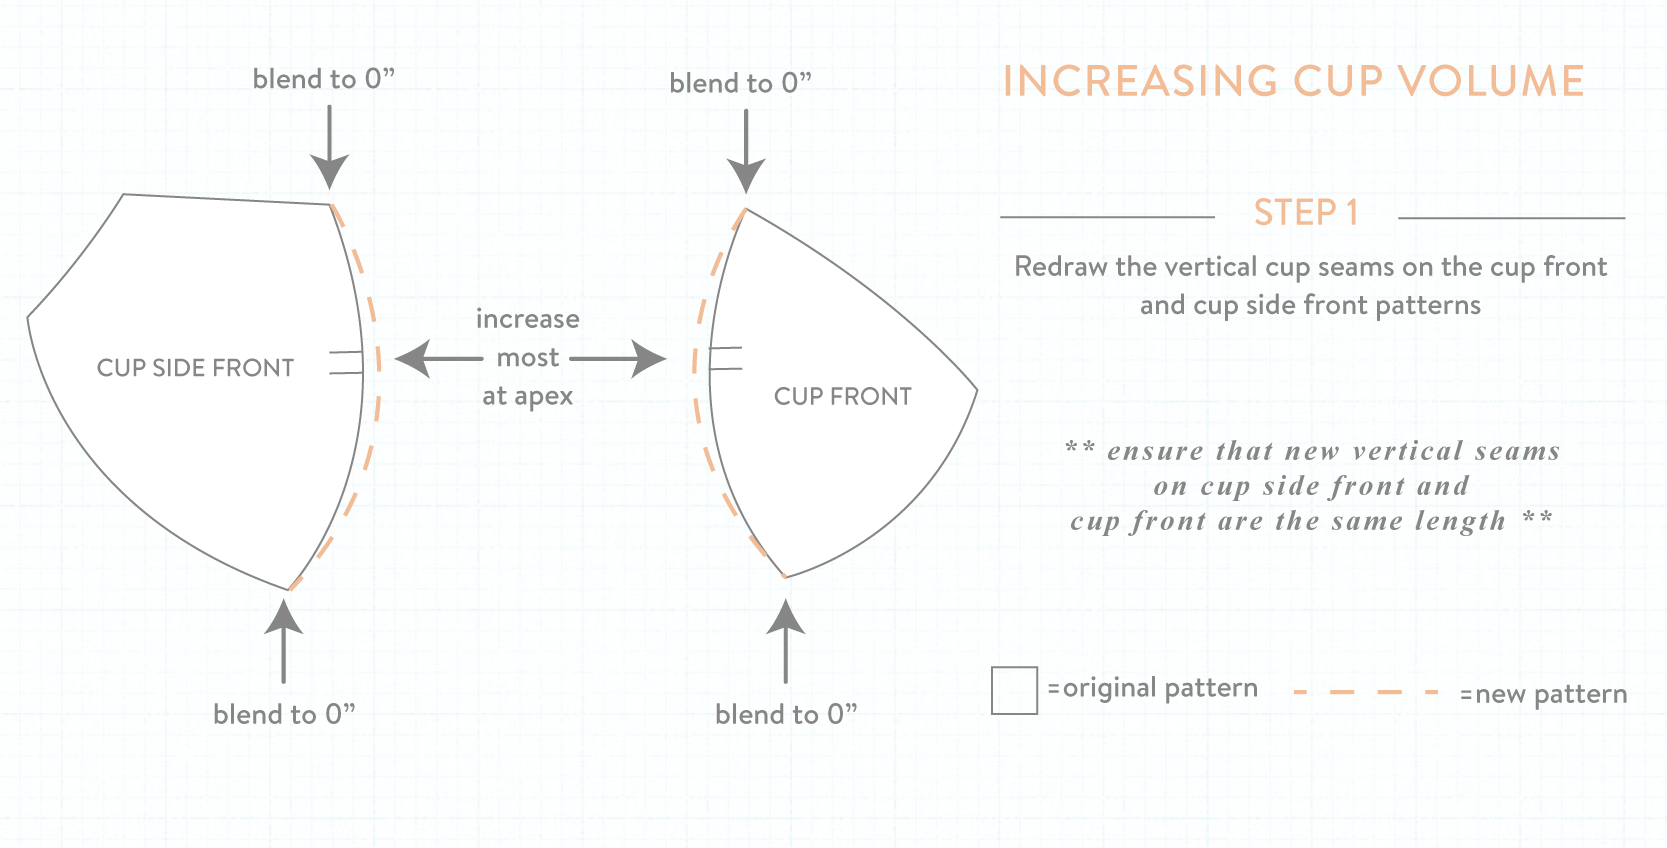
INCREASING CUP VOLUME: If you’re breasts/boobs/chest feel like they’re coming out of the top of your bra cups, then you may need to cup up a cup size, or you may need to increase cup volume. If you’re the latter – you will redraw the vertical cup seams on the cup front and cup side front patterns. There’s no need to get fancy with your lines. Just make sure that you add the most at the apex (unless you’ve determined that your apex sits somewhere else) and then blend to 0″ at the top and the bottom. After, ensure the length of the new vertical seams are the same length. There is no need to true up the top and bottom of the cups since you blended to 0″.
If you’re cups are standing away from your body/chest, then you need to reduce the cup volume. To do that, you do the opposite as above.
LENGTHENING THE BACK BAND: Mark a vertical line down the center of the back band. Then, cut along this line. Just like increasing the neck length, you’ll spread the pattern the desired amount.

CUTTING DOWN THE UNDERWIRE: I sell demi underwires for the 8624 in the web shop, but if you have a pair from a RTW bra that you want to repurpose, you can cut down the underwires using a wire cutter. Amy from Cloth Habit has an excellent post.
ADDITIONAL TIPS FOR LARGER CUP SIZES: If you’re a larger cup size, I suggest using sheer cup lining, which I offer for sale here, for the front overlay. The weight of the breasts in larger cup sizes can cause the area near the strap points to “bow” out. The 8624 kit comes with stretch mesh, but using a firm lining will help keep the girls in place.
Meg
Thanks for the great tips! One question: I started making this pattern with non-stretch lace, as you suggested for fuller busts, but the overlay is now much too small for the foam cups. Is this because of the overlay not having any stretch, or could there be another reason?
Madalynne
I’m so glad you’re making an 8624!
Without seeing your project, it’s hard for me to accurately know what’s going on. From what you tell me, however, I agree that using a non stretch lace is the reason why the front overlay is too small. If you didn’t sew the bust dart on the front overlay, would it fit? Just trying to think of a solution so you don’t have to cut a new one.
Terry Lehman
I am very full busted, BUT have had a mastectomy. So, I need a front hook bra pattern in a 48G size. Is this possibly with this pattern?
Madalynne
I’ve haven’t seen this alteration before, but when there’s a will, there’s a way!
Thinking aloud – you could add a front clasp to the strap elastic the connects the two cups and make the back band one continuous piece. You will still have to pull the bra over your head to get it off since the picot elastic at the neckline connects the right and left sides.
Linda
Super helpful as always. Thanks so much!!
Maddie Flanigan
You’re welcome, as always ;)
prestonmotor
Thank you RG.You are the best.