


Madalynne X Simplicity 8229 Variation

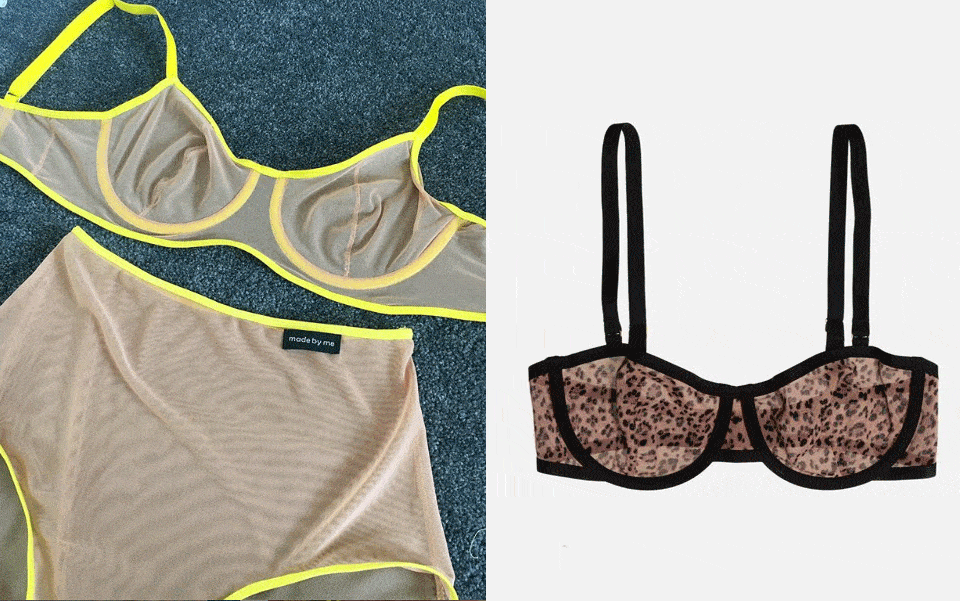
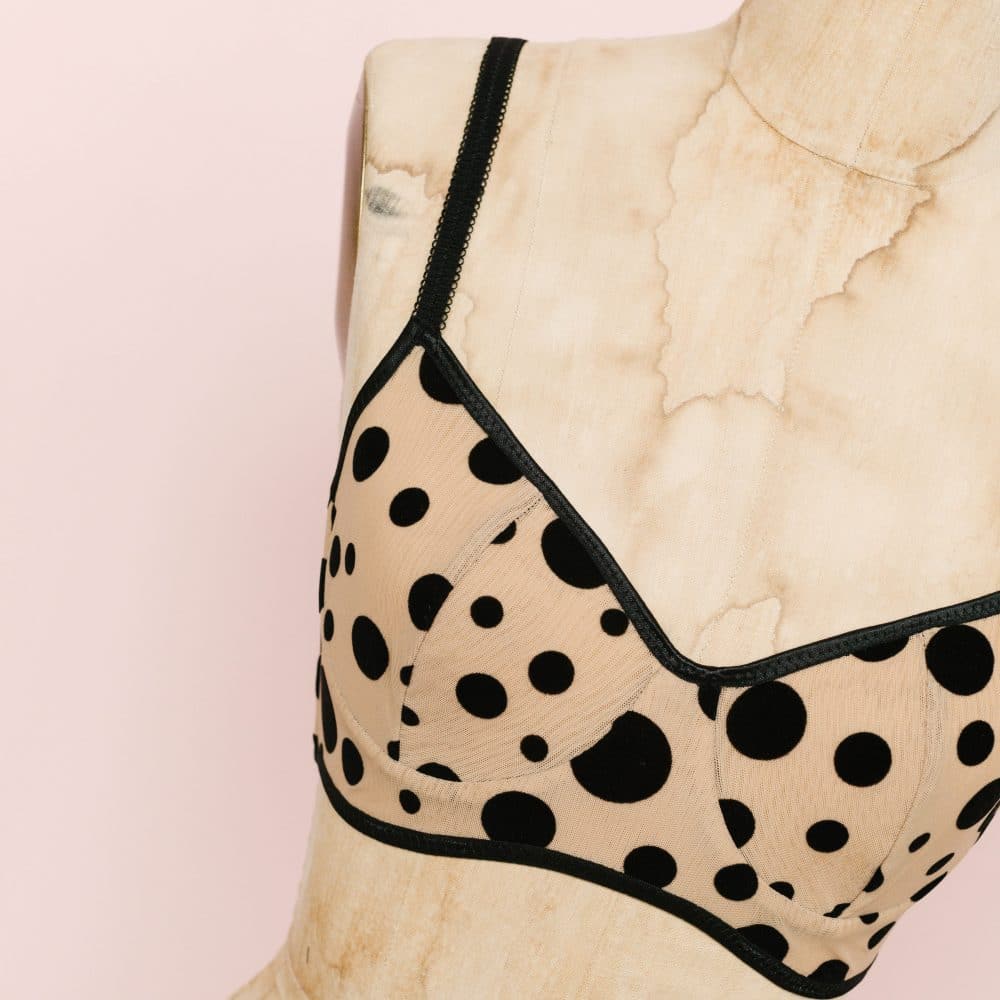
In March 2019, @megandmachine posted her me-made Madalynne X Simplicity 8229 underwire bra pattern. She used a beige stretch mesh for the main fabric and contrasting neon yellow fold over binding (that she dyed herself!). Gorg! Just simply f*cking gorg… and creative… and cool. I made a mental note that I had to do some version of her 8229 in the future. HAD TO!
Since the new year, I’ve been refreshing DIY kits with new fabrications. New year, new lingerie, right? First was the Eloise in this white + blue and black + pink. Then was the Madalynne X Simplicity 8228. There were 2 new kits for View B – here and here – and then 1 new kit for View A. Then it came time for a new 8229 and Meg’s 8229 came to mind. Another recent inspiration was CUUP bras that have been popping up on Instagram. Now was the time.
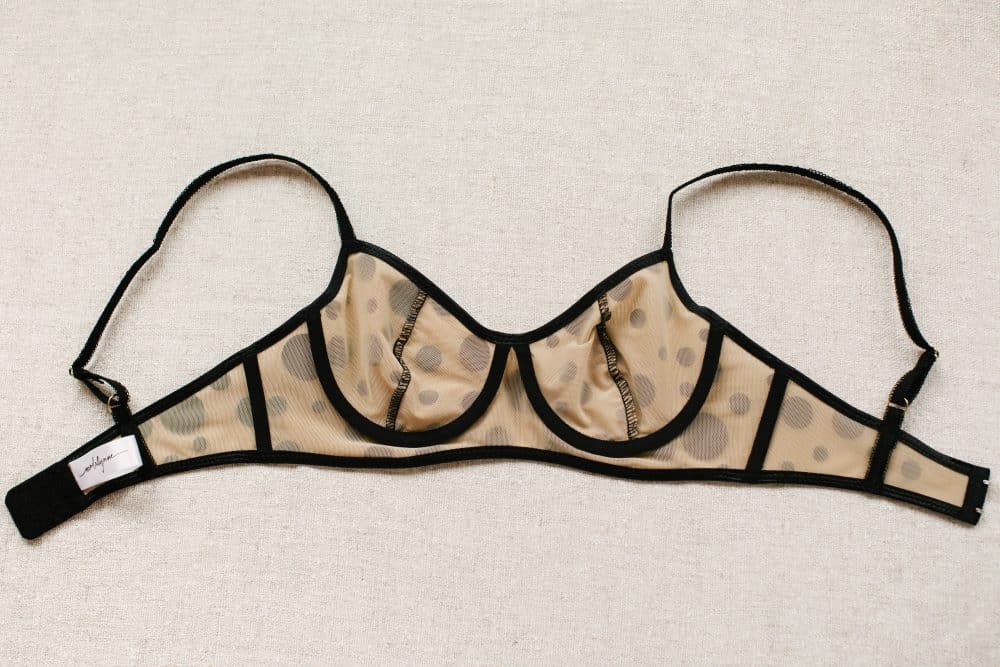
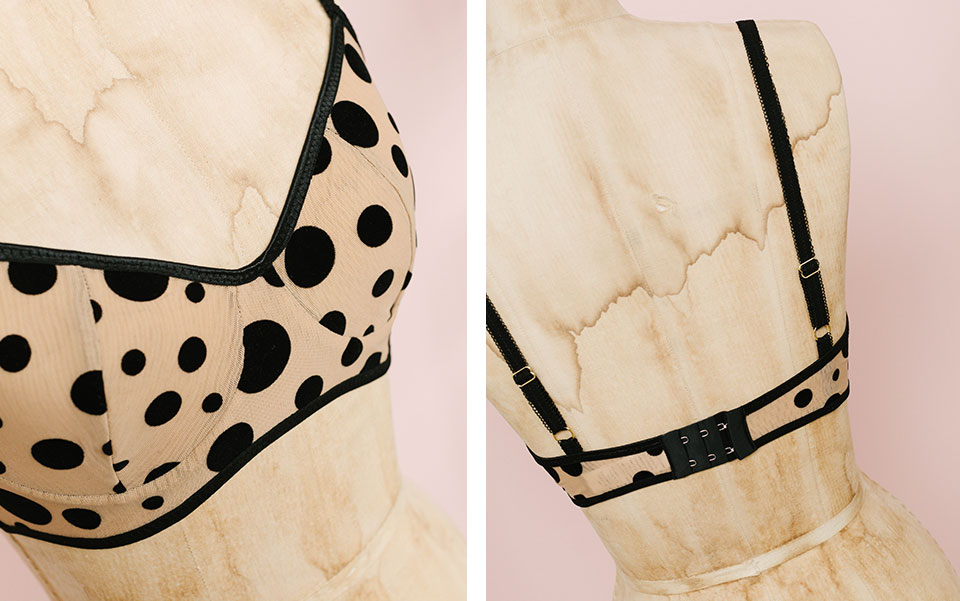
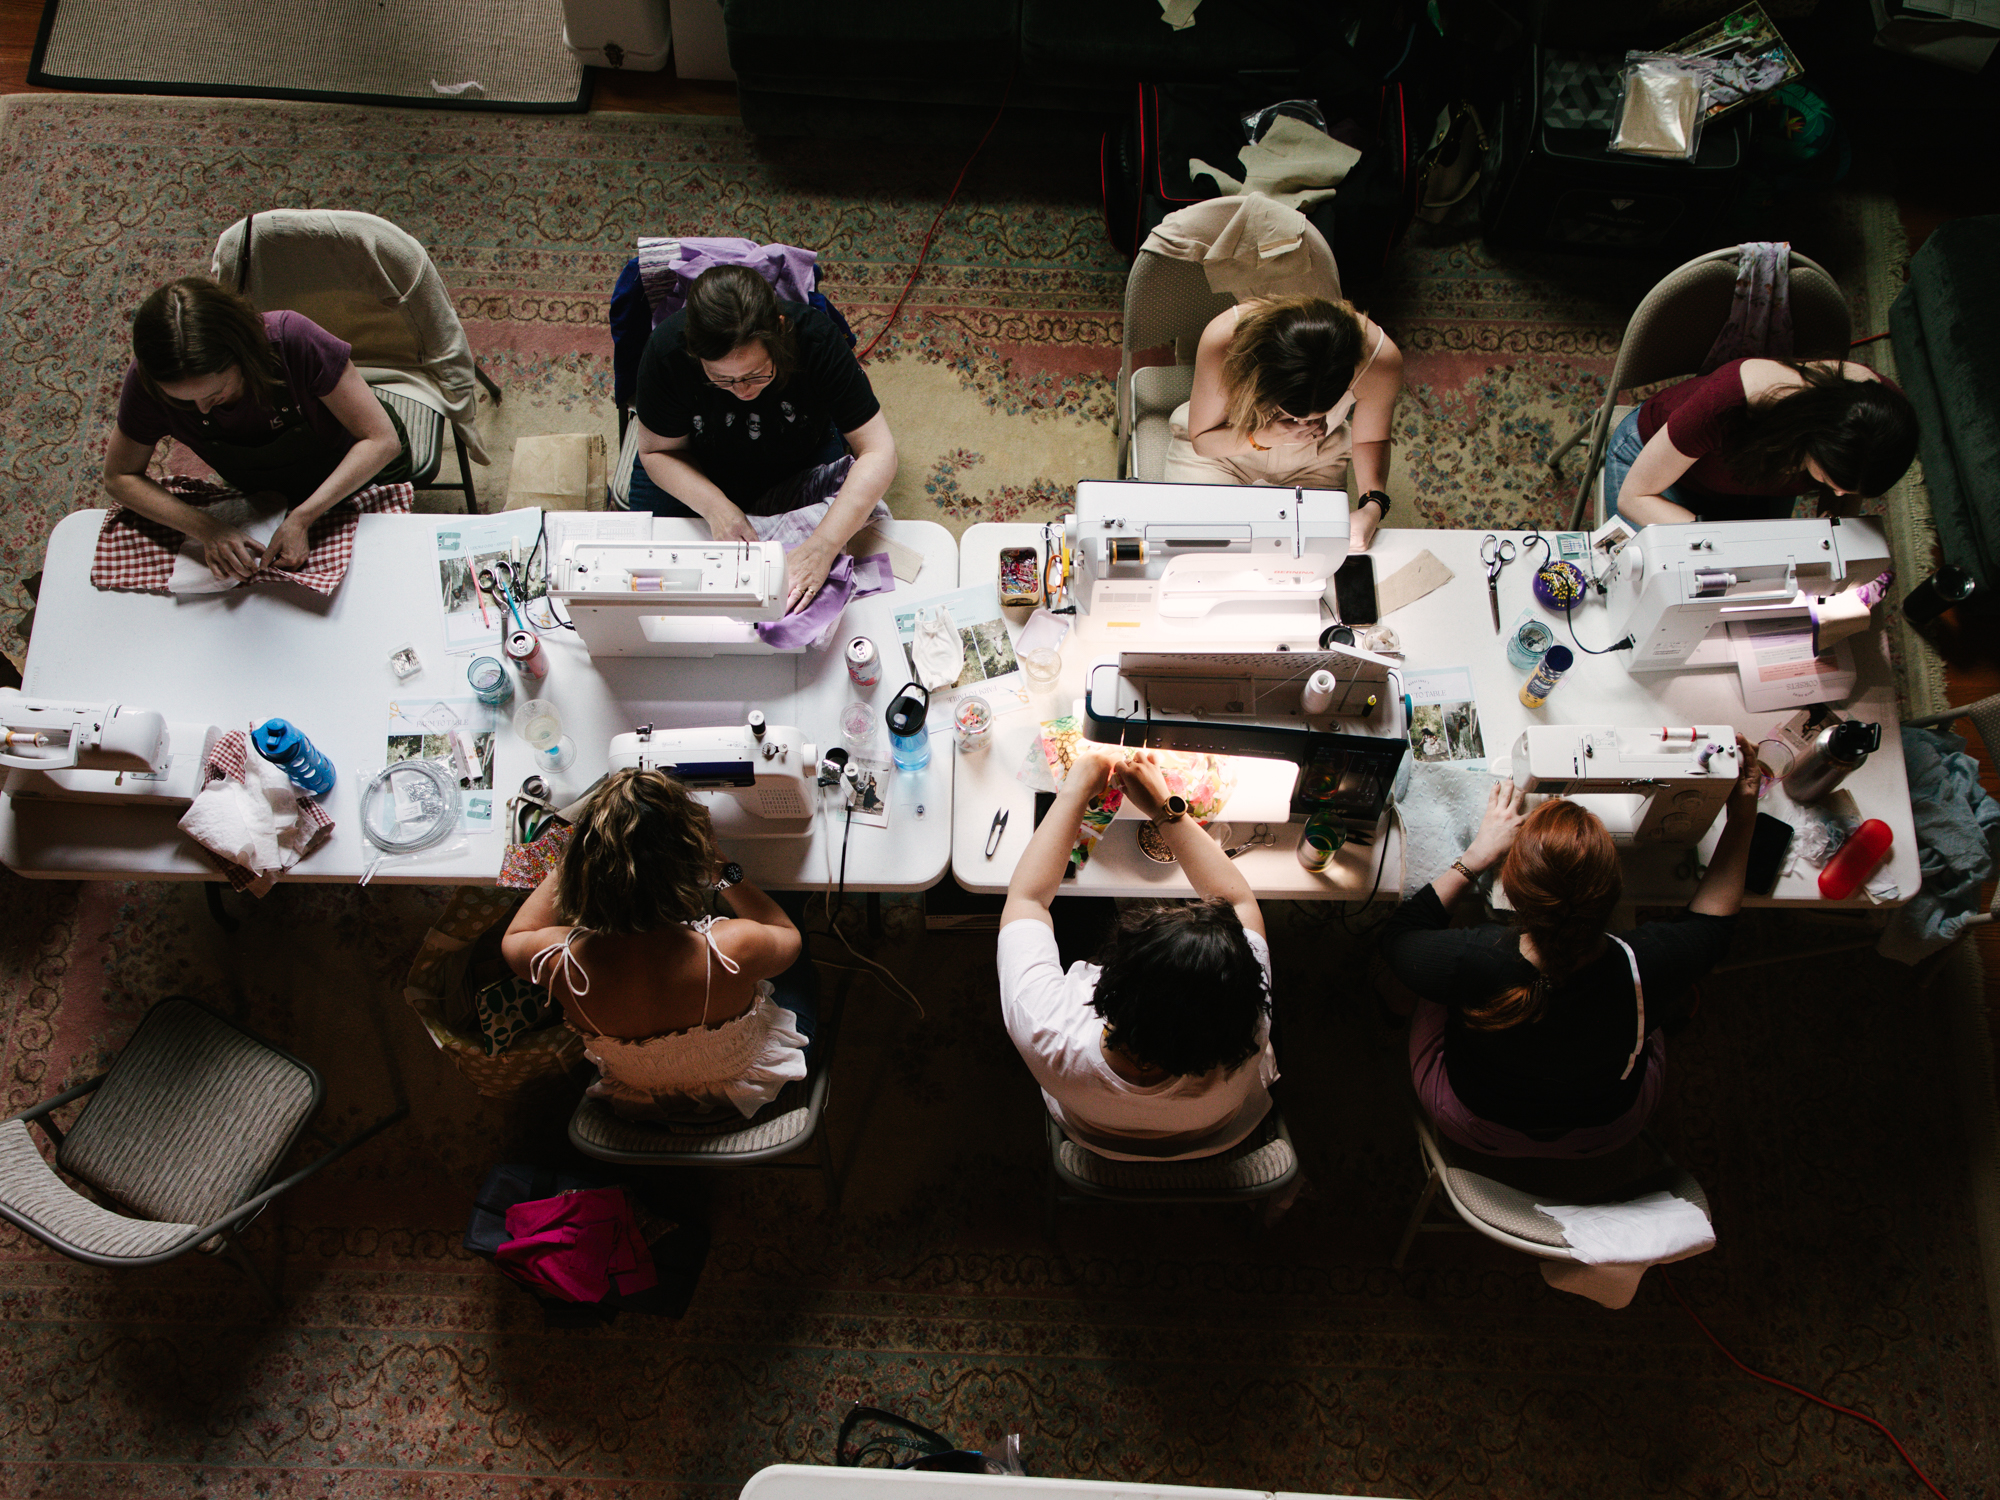
I used this amazing beige + black flock dot from Milan and black FOE to recreate this variation of the Madalynne X Simplicity 8229. There were a few pattern alterations I had to make, as well as changes to sewing. Below is an outline of those changes so you can make your own version! Yep, this is available as a DIY kit – click here to shop.
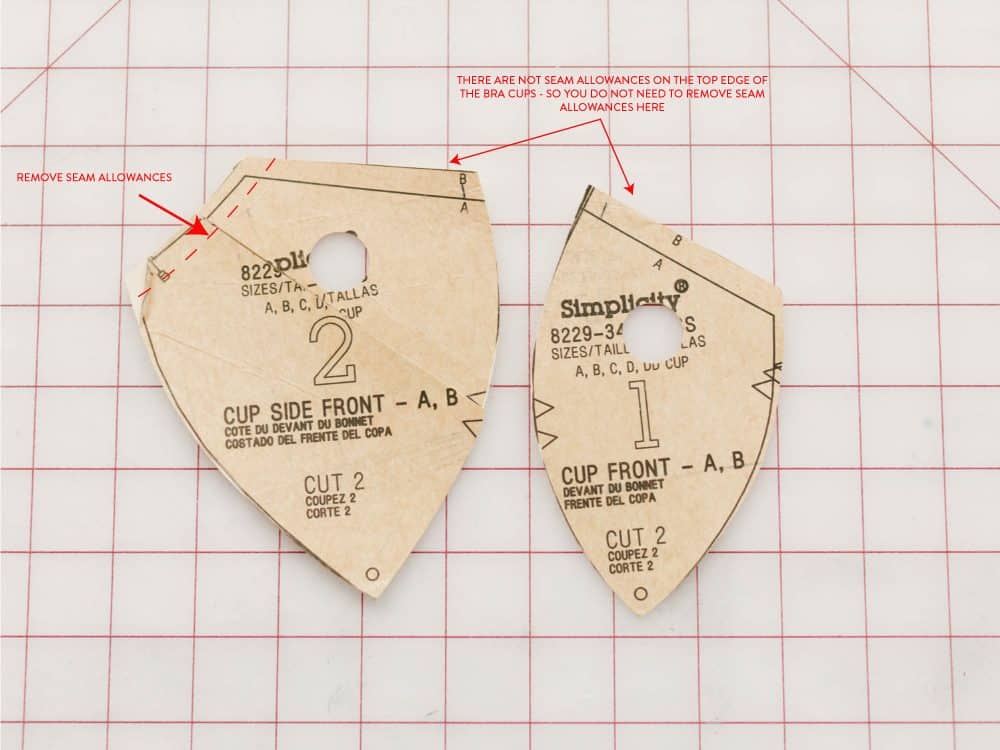
PATTERN ALTERATIONS:

SEWING:
Use ballpoint or stretch needle for all steps except those with channeling. Use universal needle when sewing channeling.
All seam allowances are ¼”
ASSEMBLE THE CUPS
a. With right sides facing, sew inner and outer cups together using a straight stitch. Serge then press to one side using an iron on synthetic setting.
SEW CUPS TO FRONT BAND
Sew cups to front band using a straight stitch. The cups should fit with no puckers and no fabric left over; they are not eased in.
SEW SIDE SEAM
Sew back band to front band at the side seam using a straight stitch. After, sew plush channeling directly over side seam stitches. Channeling should be facing towards the back band when finished.
ATTACH THE CHANNELING
With wrong side of bra facing up, fold the bra so that the cups and the front band are pointing in one direction and the cup seam allowances are pointing in the other direction.
Place channeling over seam allowance with left edge of channeling aligning with cup seam. Sew channeling to cup seam allowances approximately 1/8” from left channel’s edge. Use a straight stitch and make sure that you’re stitching through seam allowances only.
ATTACH FOLD OVER ELASTIC (FOE)
Sew FOE to bottom of bra, front neckline, and underarm/top band in that order. When sewing the first pass of FOE at underarm/top back band – fold back the FOE at the strap point. When you flip and sew the second pass, this will finish that edge. Underwire channeling will not be sewn down again – this is called “floating channeling” and will give a super clean appearance on the exterior. Both the channeling at the side seam and wire seam will be finished in the FOE elastic. So be sure to insert underwires before sewing the second pass on the underarm/back band. 9. SECURE CHANNELING
ATTACH HOOKS + EYES
*Eyes go on the left side of the bra as if you were fastening it on someone else, and hooks go on the right*
Open tape on eyes and wrap around raw edge at center back. Sew using a straight stitch 1/8” from the tape’s edge. For the hook side, wrap the tape around the fabric’s edge, and sew 1/8” from edge with hook facing up. You must sew with hooks facing up to avoid your machine from getting damaged.
MAKE STRAPS
Cut a length of strap elastic 18” long. Feed one end of strap up through the bottom of one slider, then over the center bar and down through the other side. It should look like a belt buckle, with one short end and one long end. Fold the short side down and stitch back and forth with a straight stitch to secure. Trim close to stitching.
Turn elastic over and put one ring through the long side.
Weave long side up and over center bar of the slider just like you just did.
ATTACH STRAPS
With wrong side of bra facing up, overlap strap + strap point 5/8”. Using a straight stitch, stitch back and forth 1/4″ from top edge of cup. Stitch another line parallel to the first and approximately 1/4” below (optional – for extra security). Trim edge if necessary.
To attach elastic at back, cut another strip of elastic that is 4” long and feed through ring. With wrong side facing up, overlap strap ½” at notch point. Stitch back and forth ¼” from top edge. Trim if necessary.

No Comments