Corset Making Supplies
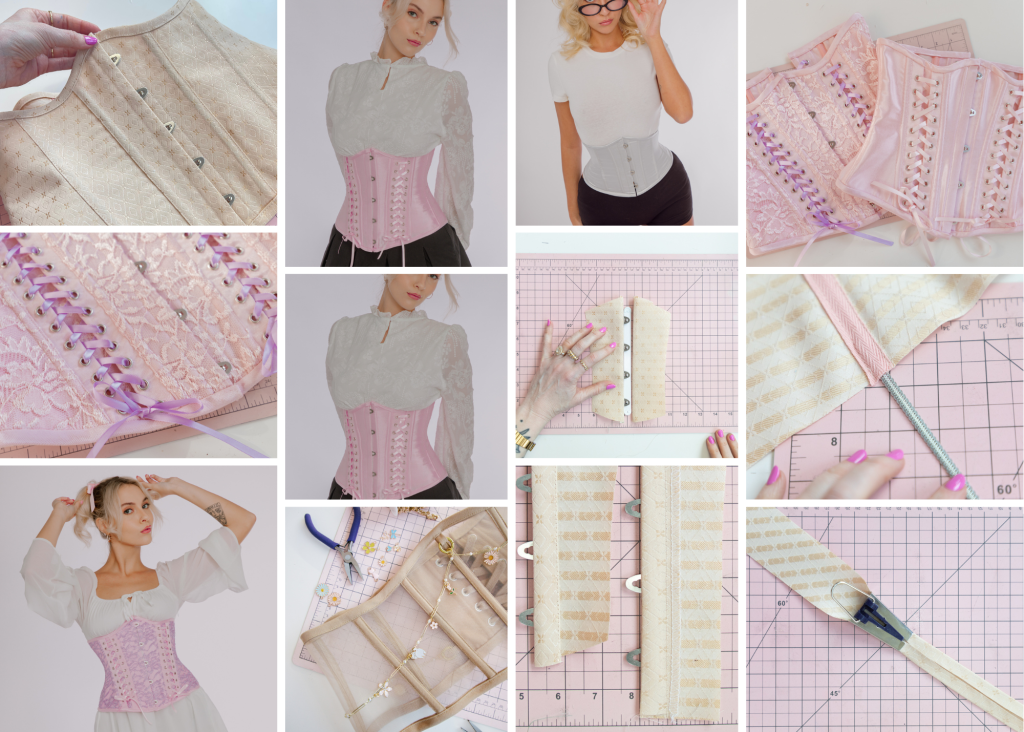
A corset – a true corset and not a Forever 21 version of a corset – is a work of art. It requires about a yard of fabric (maybe more depending on the size), some steel boning and laces, but it can reshape the body in incredible ways. If you are reading this post, then I’m going to assume that you are interested in sewing a corset. Why read this post and what do I hope you learn by the end?
When I took a corset course, I had all the sewing skills to make a corset. Yes, I could follow sewing directions and sew a corset, but I didn’t have a strong foundation – I didn’t understand the how and the why. What is coutil? When do I use spring steel versus flat steel boning? So at the end of this post, I hope you understand a few corset basics such as fabrics and boning as well as all the information about the Annette + Annabelle patterns.
Click here to shop DIY corset kits, corset supplies and more!
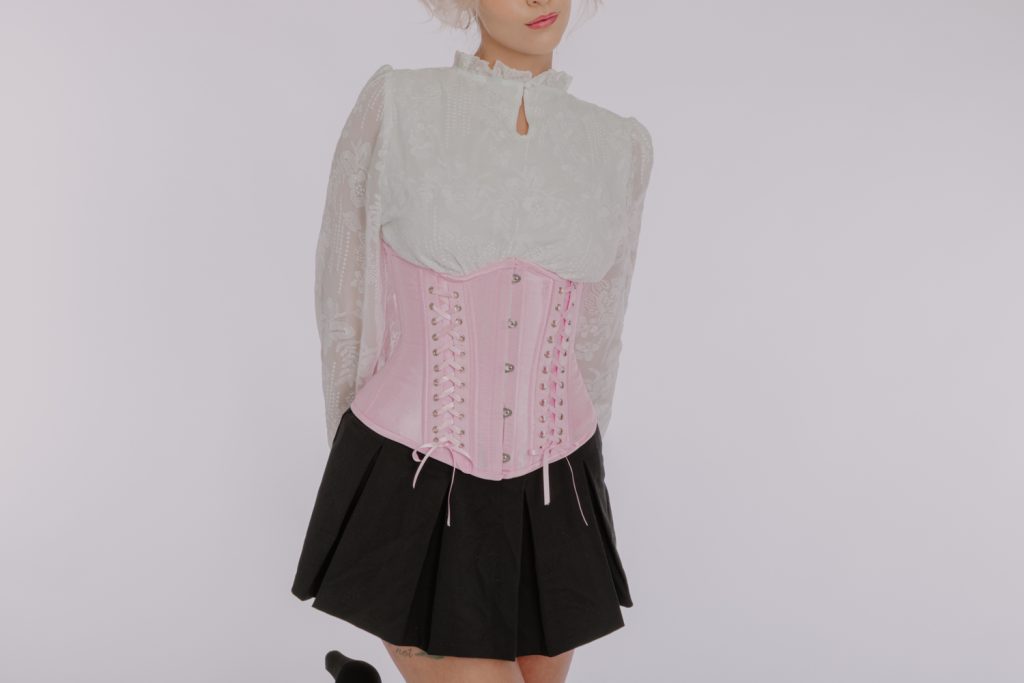
Why Make a Corset?
First, why make a corset? What can you gain from sewing or wearing one?
- Hourglass figure: The first time I laced into a corset and looked at myself in the mirror, I said, “My waist has left the building!” 🤣 The amount of waist reduction varies depending on the pattern design, your body’s composition, and fabric and boning used. Your waist could reduce less than 1″ or more than 4″, but you will have a more hourglass figure than you did without wearing a corset. If you’re looking for a garment to slim your midsection and create an hourglass figure, then you will love corsets!
- Improves posture and can reduce pain: Personally, wearing a corset hasn’t improved my posture while standing, but it definitely has while sitting, especially sewing for long periods of time. If I’m sewing for an extended period, I tend to hunch over. Then my back gets sore and can sometime hurt later that night. Let me tell you – you will not hunch over while wearing a boned waspie or underbust corset!
- Improve sewing skills: Corsets have a reputation for being a sewing project only for experienced or super advanced sewists. Not true. Even a beginner can sew a corset. You must be comfortable around a sewing machine and know basic stitches and sewing techniques (straight stitch, edgestitch, what a facing is, etc). That’s it!
What Makes a Corset a Corset?
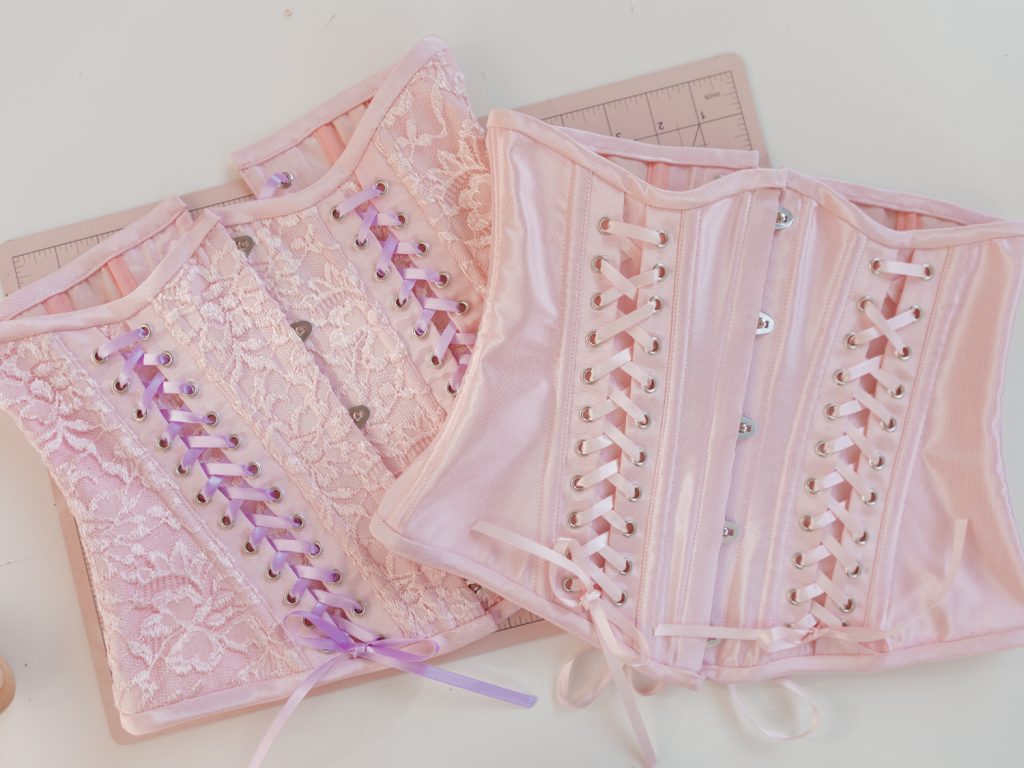
Okay, okay – one more thing to cover before getting into corset making supplies. What makes a corset a corset? The word corset is trendy right now, and a lot of people use it to describe garments that aren’t corsets. Stretch fabrics – not a true corset. Plastic boning – not a true corset. Those are “fashion corsets”. Different people (and different corsetierres) will have a varying definitions of what makes a corset a corset. The definition of a corset is a garment that is made to alter the shape of the body, specifically the torso, and is achieved with two things (that many fashion corsets don’t have):
- Busk
- Lacing
The busk and the lacing system work together – via negative ease and pressure – to change a person’s shape. Without the busk, there is no support in the front. The front busk doesn’t have to have a closing like the Annette – it can just be hardware like flat steel boning. As pressure is applied via the lacing system, the busk supports the garment so that that all the other components will work correctly. Without both of these elements, the corset deviates from its definition and is no longer a corset.
Some other characteristics or corsets, but do not define a corset:
- Strength layer – Coutil is the most widely used corset fabric, but drill or canvas fabric are also used.
- Waist tape – Twill tape is the most widely used.
- Binding – Bias binding is sewn at the top and bottom edges. Can be self made of store bought.
Corset Fabrics
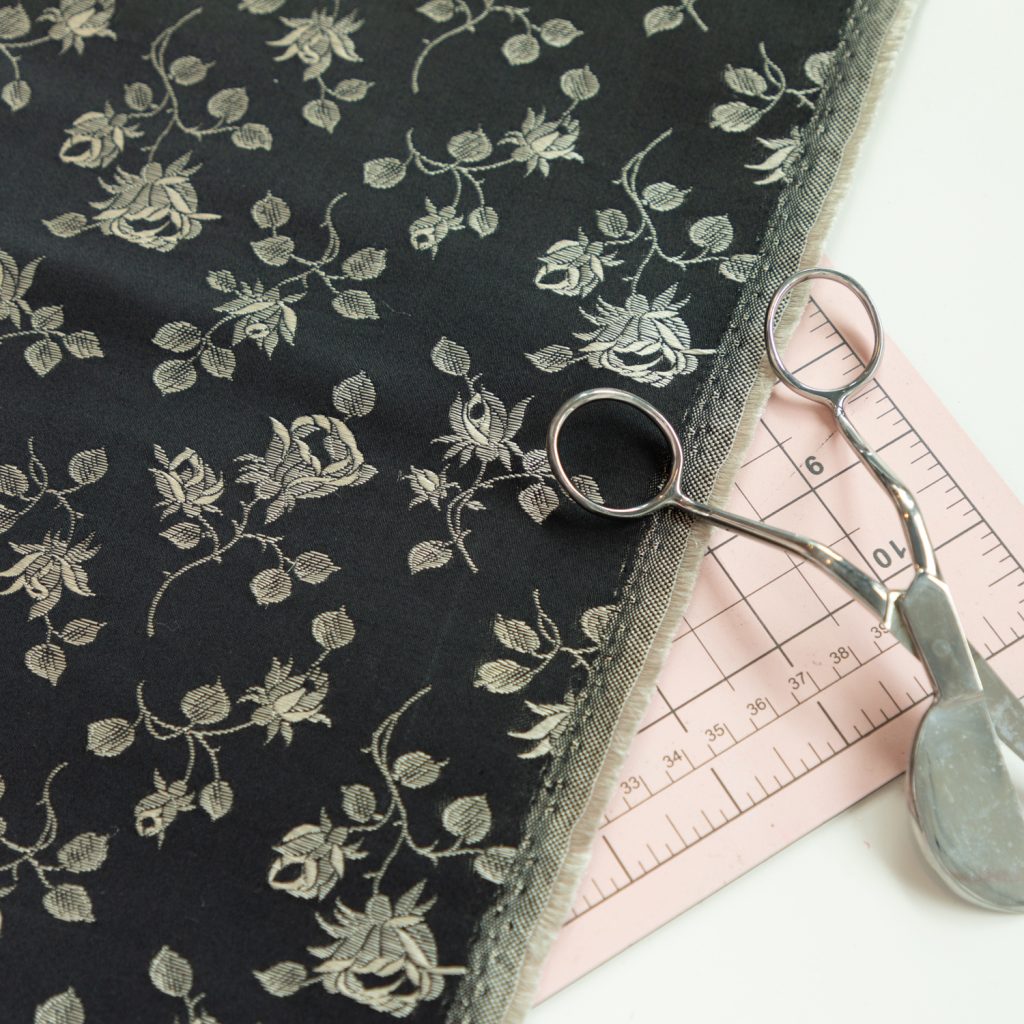
Fabric choice is extremely important in corsetry. You need a strong fabric if you want to achieve waist reduction and cannot use sheer, lightweight, or floaty fabrics like chiffon. There are lots of other fabrics that could be used for corsetry, but I am only concentrating on the ones that could be used for the Annette + Annabelle corsets.
Coutil: Coutil is the most popular fabric choice for corsets. It’s heavy and is strong enough to hold up to metal boning, but also soft against the skin. It can be used by itself for “single layer corest” or with another fabric as a “strength layer”. Coutil comes in different types and weights, from plain herringbone weave to decorative brocade. The most recommended type is 100% cotton or cotton/viscose blend. Natural fibers are more breathable than a polyester. Coutil is expensive because it’s a popular fabric that is hard to find, especially since there are only a few mills that are still making it.
All the fabrics below are types of coutils.

Canvas, Drill of Calico: These fabrics are more affordable alternatives to coutil. I recommend them for sewing toiles.
Satin, Silk, Lightweight Fabric, Brocade: Your fabric stash will love you for this – lightweight fabrics and brocades can be used for corsets, but they must be combined with coutil, canvas, or drill to “beef it up”. How do you do this? Interfacing, which in corsetry is called a “strength layer”. In bra making, sheer cup lining or tricot is used to add stretch to bra cups and frames. You wouldn’t sew a bra with unlined bra cups if you were looking for a supportive bra.
In corsetry, think of coutil as sheer cup lining. Some fabrics, like satin backed coutil pictured above, is satin that is already fused to coutil. Other fabrics, like this stabilized satin is fused to tricot. If you have a beautiful brocade in your stash that you want to use and isn’t already fused to a stretch layer, you can do it yourself by using a temporary spray adhesive like Odif 505, Bondaweb or another fusible interfacing. This is what I did for this cropped fashion corset – fused a layer of brocade to a layer of coutil with Odif 505.
Corset Mesh: Corset mesh varies greatly – there is super stiff crinoline, open fishnet, tulle, bobbinet. All of these fabrics fall under the umbrella of corset mesh because they can be used for a corset, whether they are used as the main fabric or for the strength layer. For the blog post, I will only concentrate on corset mesh that looks and feels like a softer version of crinoline because it’s what is used in the Annabelle. If you want to learn more about bobbinet, fishnet or tulle, do a quick search on Google or YouTube.
When using corset mesh, it is important to use a mesh that does not stretch and is strong enough to withstand reduction without tearing. Even though a mesh corset looks like it uses sheer cup lining or tricot – do not use this fabric for your corset! Yes, it is strong enough for your big boobies, but it will tear if you try to lace it tightly, especially over time. The mesh that is used for the Annabelle corset feel like crinoline, but are a little softer.
Mesh corsets are a great option for someone who wants the look of a corset but with a little flexibility. They are not recommended for extended wear or tight-lacing however. Many people wear mesh corsets over clothing as a fashion piece and appreciate the sleek, cinched look it provides.
Corset Busks and Corset Boning
Shop all corset busks and corset boning
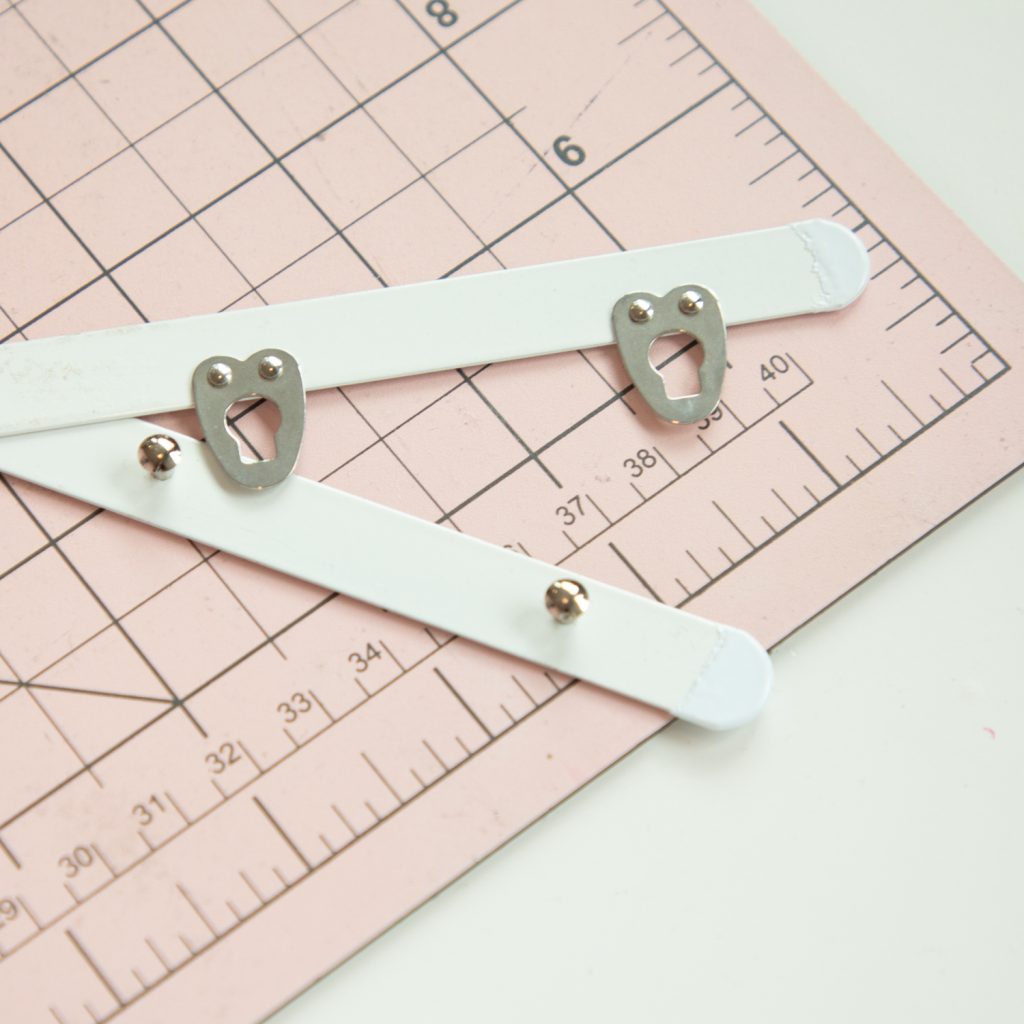
Busks: A corset busk is placed in the front to give a flat appearance and comprises of a steel with a hook/loop side and a stud side. A busk does not have to be two pieces with an opening (loop side and stud side). Until the mid 1800s, busks was a single piece of wood, ivory or metal inserted into a channel behind the center front. Some busks were carved and given as gifts. The two piece (or split open) busk democratized corsets. No longer did women and men need two people to put on a corset.
It’s not uncommon for a busk to be put in backwards. The hook/loop goes on the wearer’s right side. This is because the wearer uses his/her right hand to fasten the loops over the studs (assuming he/she is right handed).
Busks are usually ½” wide (¼” on each side) but can be ¾” or 1”. Wider busks are most often used for medical purposes.
There are types of busks that are tapered or shaped like a spoon towards the bottom, but since the Annette and the Annabelle don’t use them, I will cover it in this blog post.
Wanna learn how to insert a busk? Watch this tutorial!
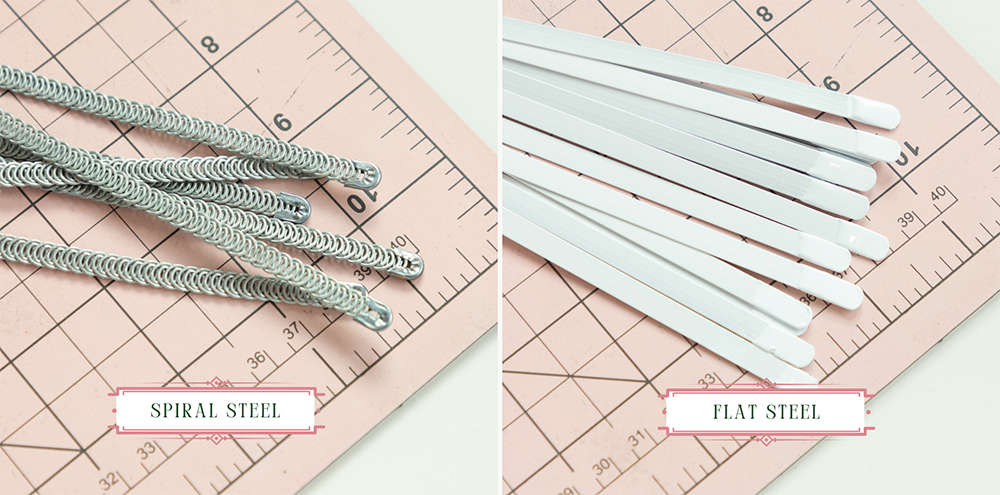
Spiral steel boning: Spiral steel boning is made from flattened steel spring. It is much more flexible than flat steel boning. It can flex forwards and backwards as well as side to side. This is the preferred and most commonly used boning throughout a corset and is used everything except on either side of the eyelets. Spiral steel boning can be continuous or precut. Continuous is more affordable, but cutting and adding tips is very tedious.
Flat (spring) steel boning: Flat steel boning is made from sprung steel and is available in widths from ⅛”-¾”. It has a white plastic coating that looks similar to a bra underwire that prevents rust and damage to the fabric. Flat steel boning can flex forwards and backwards, but not side to side. So they are only used where horizontal movement is not required. Most often used on either side of eyelets at the back of a corset.
Plastic boning: Plastic boning qualities vary greatly, from cheap versions found at craft stores to better versions that are thick and sturdy. Plastic boning is great for fashion corsets, but it should not used in true corsets where waist reduction is the goal.
Synthetic whalebone and cane are other options for corsetry, but since it is not used in the Annette or Annabelle, it is not covered in this blog post.
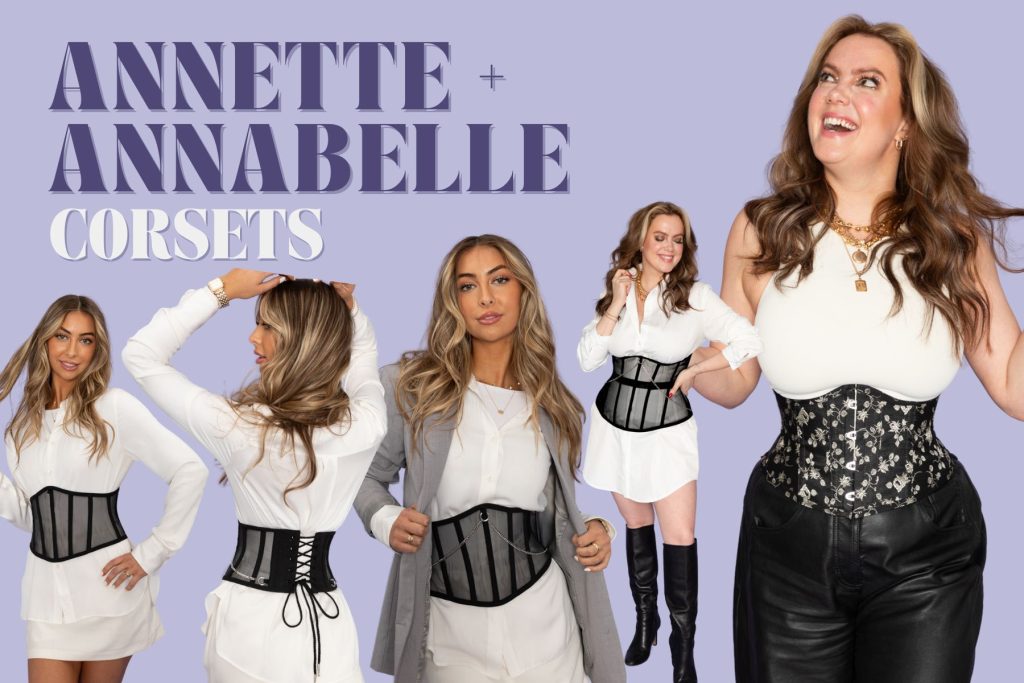
Now let’s move onto the Annabelle + Annette corset patterns! The Annette + Annabelle are simple, single layer underbust corset and waspie. They are a great pattern for all levels sewists to learn fundamental corset making skills and techniques without worrying about fitting the bust. The pattern is drafted to give minimum waist reduction (1-2″) so that it can be worn as a foundation garment as well as outerwear. Additional features include:
- 12 panels (6 on each side)
- Boning channels
- Optional waist stay
- Optional chain detail for Annabelle
- 2″ lacing gap at back
- Bias binding at top and bottom edges
Both Annabelle and Annette include a waspie and underbust pattern, so why are they separate patterns? There are two differences that were big enough to warrant making two separate patterns.
1. The Annette includes a busk at the center front, so there is a center front facing piece so that it can be inserted and clean finished.
2. The construction of Annette and Annabelle are different. To sum it up – the vertical seams on Annabelle are sewn with wrong sides together and the bone casing is exposed. The vertical seams on Annette are sewn with right sides together and the bone casing is on the inside. There are other minor differences in construction, but those are the two main ones.
Each pattern is $9.00 and bundled together for $16.00, which is the normal price of a Madalynne pattern.
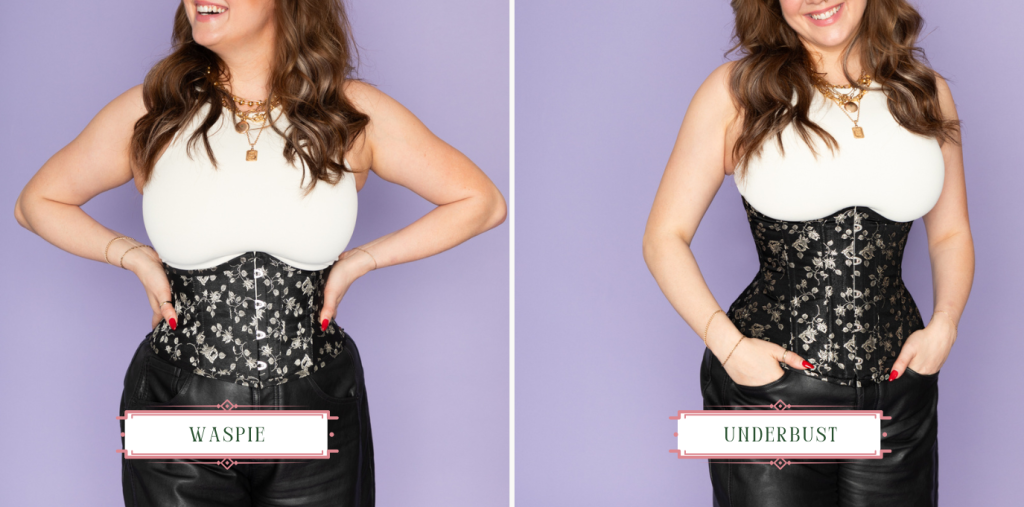
Don’t know what the difference is between a waspie and an underbust corset? Annabelle and Annette are a type of corset that only covers the midsection. There key differences and pros + cons for each.
Waspie: A waspie is a type of underbust corset but shorter. Essentially, it is a very wide belt. It sits around mid torso. Waspies are one of the quickest corset sewing projects. It is also an excellent garment to wear if doing a lot of sitting (ex: sewing, driving) as it helps with postures – it is short enough that the bottom doesn’t dig into thighs when sitting down (can happen with an underbust corset).
Pros: More mobility than an underbust, easier to wear as a fashion piece over clothing (like a large belt), better fit for shorter torsos.
Cons: Fat displacement more visible (back + belly), no rib training, more visible underneath clothing since it doesn’t extend to bra or hips.
Underbust: An underbust corset is a type of corset that spans the length of the torso. From the hips to directly under the bust (as opposed to an overbust corset goes over the bust). Underbust corsets offer more mobility than an overbust corset (but less than an underbust corset) and are easier to conceal underneath clothing.
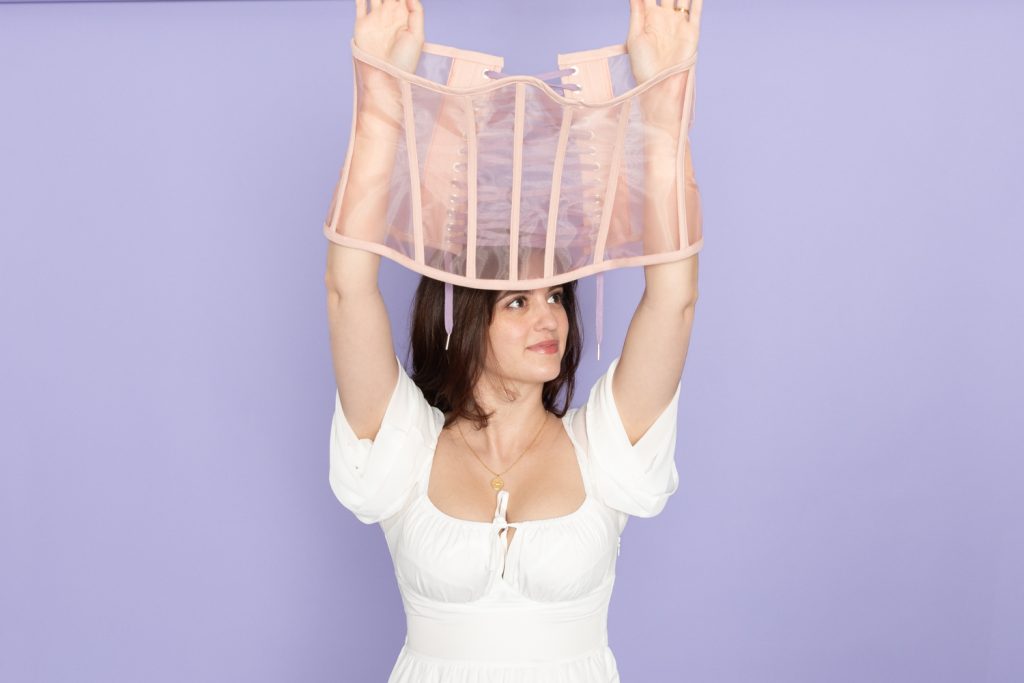
The most common questions I’ve received about corsets have nothing to do with sewing corsets. It’s been about wearing corsets. One – “Does it take one or two people to put on a corset?” Two – “Can I put on a corset by myself?” Fun fact – the invention of the split busk in the 1830s helped democratize corsets. No longer did men (yes, men!) and women need a maid/helper to lace him/her up. He/she could do it themselves!
First, let’s go over how to put on a corset with a busk (Annette) and then is how to put on a corset without a busk (Annabelle) by yourself. By no means is it as easy as throwing on a pair of sweatpants, but it’s also not as difficult as most people assume.
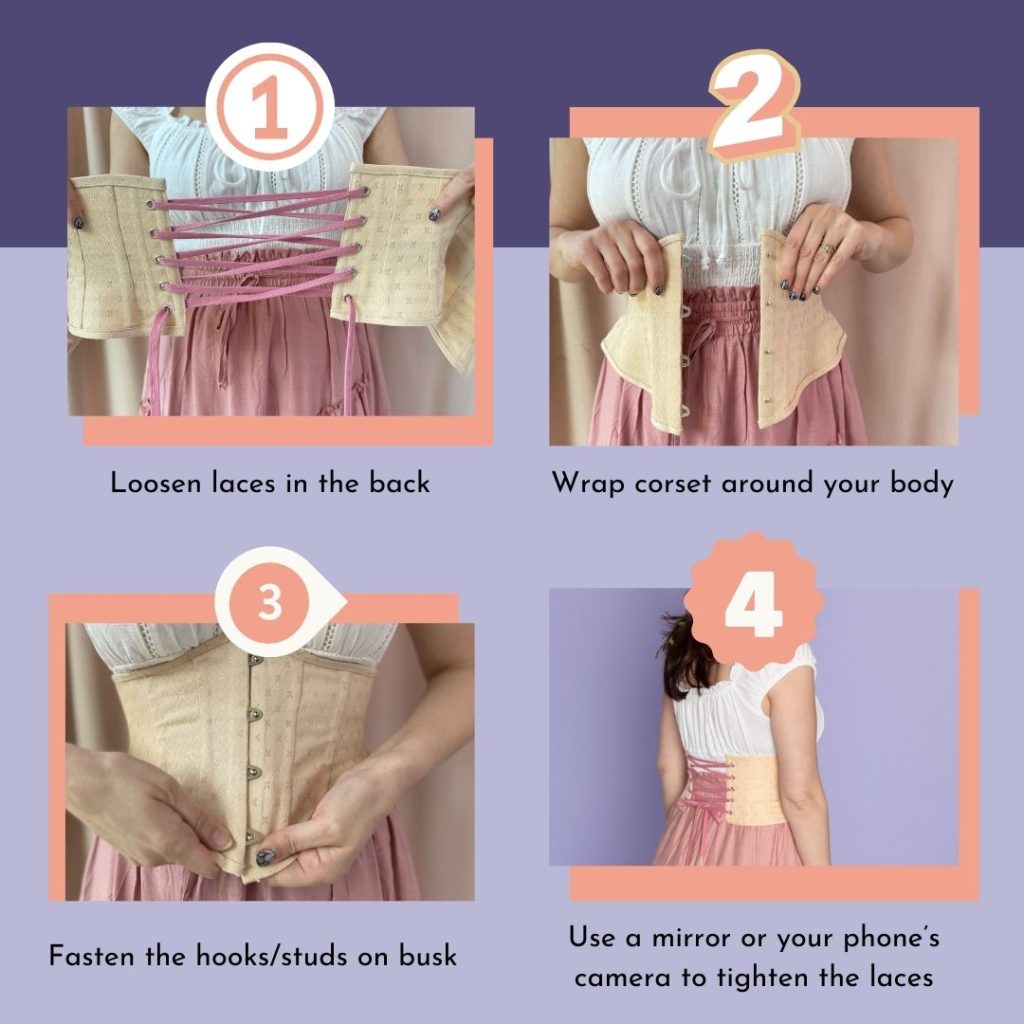
With a busk:
1. You want it to be loose enough so that there is ease (the corset’s circumference measures more than your body’s circumference) so you can easily fasten the busk.
2. Place the busk at your center front and the laces in the back. Ensure that the waistline on the corset is at your natural waist.
2. Some people find it easier to fasten the top loop/stud and then work down. Other people find it easier to fasten than work up and down. You do you boo.
4. This is where it can get tricky and require patience. Using a mirror or your phone’s camera, start pulling the laces tighter. Even people who are not flexible say that they can do this! If you have mobility issues or experience any pain while tightening, I recommend getting someone to help you.
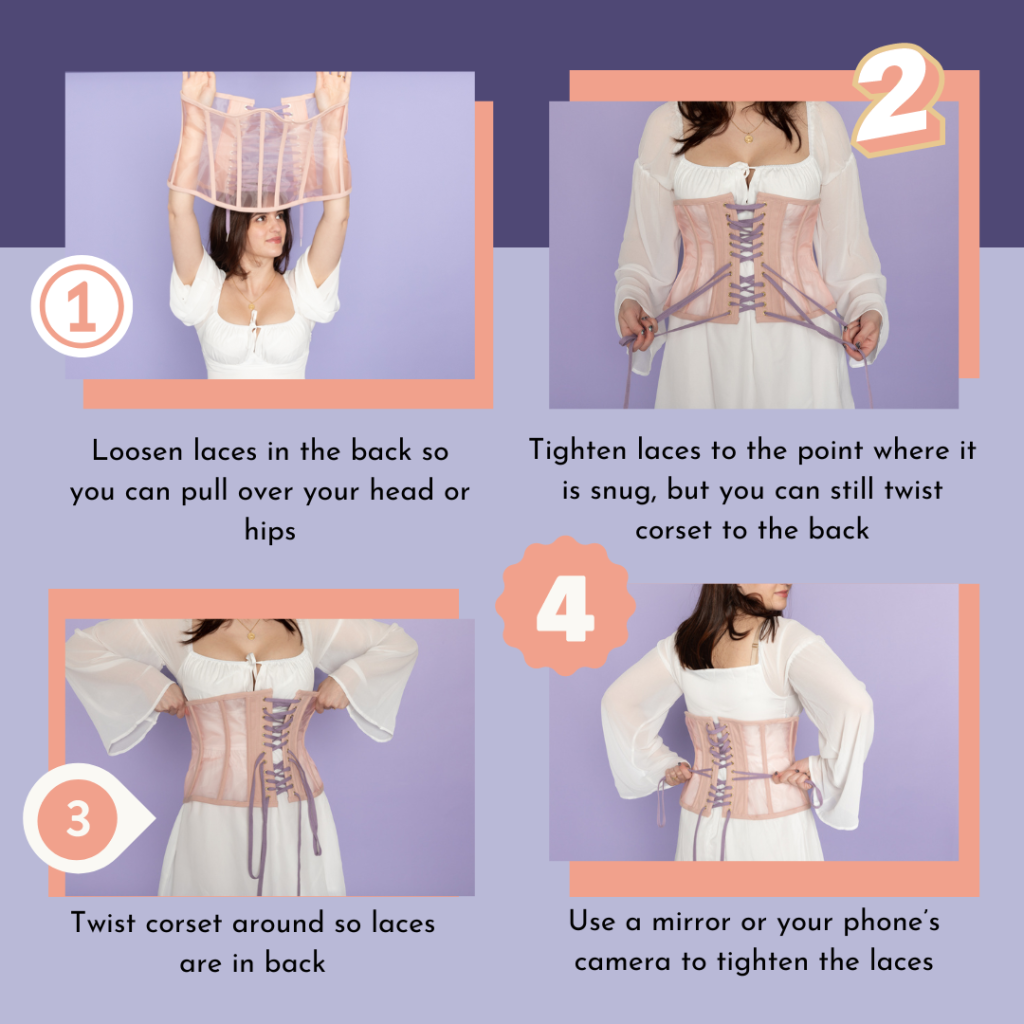
Without a busk:
1. Loosen laces in the back so you can pull over your head or hips. If you have to take out the laces from a few of the eyelets, that is okay.
2. Tighten laces to the point where it is snug, but you can still twist the corset to the back. Relace any eyelets if you had to take them out step 1.
3. Twist corset around so laces are in back.
4. This is where it can get tricky and require patience. Using a mirror or your phone’s camera, start pulling the laces tighter. Even people who are not flexible say that they can do this! If you have mobility issues or experience any pain while tightening, I recommend getting someone to help you.


No Comments
Sorry, the comment form is closed at this time.