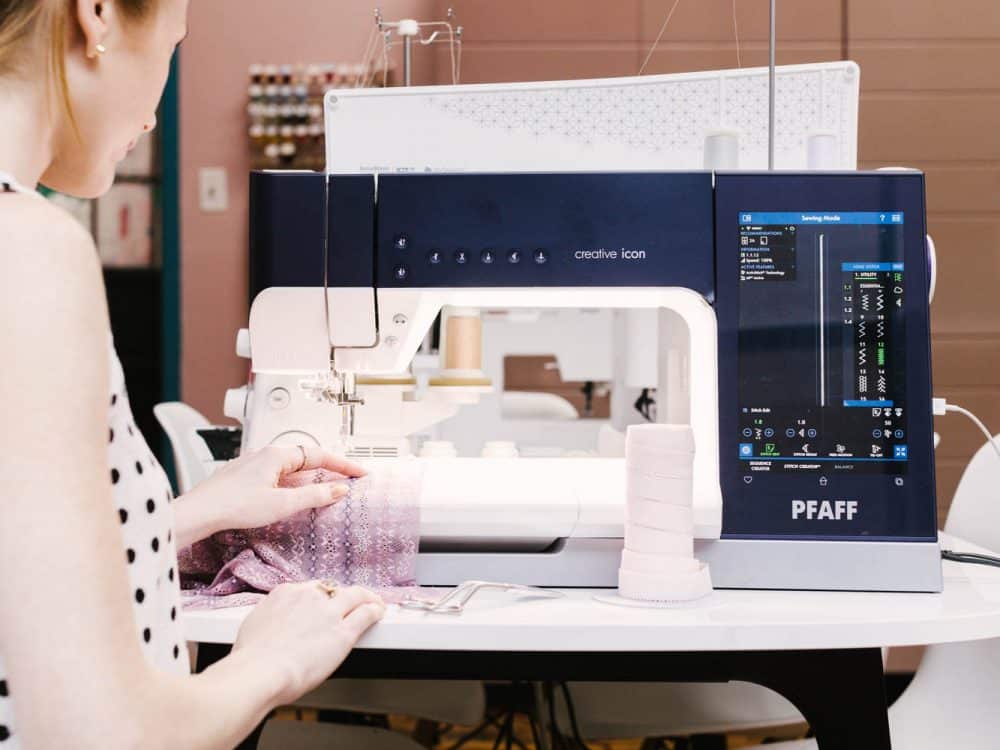
Released in Fall 2018, PFAFF® creative icon™ is the brand’s top of the line, most advanced machine that combines the best features for sewing, quilting, and embroidery. Before sewing on the creative icon™, I was all about simplicity when it came to machines. Don’t buy a machine with 300 stitches if you’re not going to use the majority of them. The passport 2.0™ was my go-to, every day machin that I used 99% of the time. It’s been more than a year, and all those additional features that I didn’t think I would need or want have improved my sewing lingerie. Looking at the machine, you probably think it took me this long to figure out all those features, but just like every other one of PFAFF® machines, it’s extremely easy and intuitive to figure out.
In today’s blog post, I will break down how I use the creative icon™ for sewing lingerie – what needle I use, the stitches, etc – and then additional features that have been super helpful. For consistency, I will keep in line with this blog post for sewing lingerie on PFAFF’s passport 2.0.
Interested in purchasing a PFAFF® sewing machine? I have partnered with a local sewing dealer so that you can purchase almost all models directly through me. Check out the sewing machines page to send me a message and receive more information on prices, warranties, etc.
Be sure to check out this Amazon list for Madalynne’s favorite bra making tools!
SEWING LINGERIE ON THE CREATIVE ICON
NEEDLE: You might be surprised, but I can and have used a universal needle, INSPIRA brand, for sewing stretch lace, stretch mesh, power net, sheer cup lining and all other lingerie fabrics as well as elastics. The universal needle also works on wovens – I tried. While I can use INSPIRA’s universal needles for all my projects, I also keep microtex and stretch needles on hand and use them regularly as well.
THREAD: I’ll say it 3 times because it’s that important – poly, poly, poly. Choose a polyester thread over cotton! Why? Because most likely you will be sewing stretch fabrics for lingerie. Polyester thread has give to it, cotton thread doesn’t. So you run the risk of your thread breaking (read: boob slippage).
STITCHES: Okay, now to specific stitches. I mostly use 3 stitches on creative icon™ – 01, 06, 09, and 12. That’s it! I put all the decorative stitches to play when I embroider lingerie!
01 – Straight Stitch: For sewing vertical seams on lingerie. Normal stitch position is 3.5, which is right in the middle. Normal stitch length is 2.5, unless I’m topstitching, in which case I increase the stitch length for 3.0+. When I’m sewing eyes onto the back band, or rings + sliders for strap elastic, I’ll adjust the needle position all the way to the right. For eyes, I wouldn’t be able to sew onto the tape – the hooks would block it. For rings + sliders, it allows be to stitch close to the hardware.
06 – Zig Zag Stitch: For sewing horizontal seams and elastics between 1/8”-5/8”.
1/4”-5/8” elastic (usually picot plush kind like this for finishing underarm, bottom band): Stitch width is 3.6 and stitch length is 4.0. Generally, this type of elastic is sewn in 2 passes. While there is no “right” or “wrong” width for sewing zig zag stitches, having it at this setting produces 2 zig zag stitch passes that don’t overlap each other.
09 – Triple Zig Stitch: For sewing elastics that are ¾” and wider (like this). Depending on how wide the elastic is, there are two options for this. I set this stitch width width to 8.0 and stitch length to 6.0. If it spans the width of the elastic, then I’ll only use this stitch. If it doesn’t, then the elastic will have a “lip”. In that case, I’ll sew 2 rows of regular 06 zig zag stitches at the top and bottom using the settings above.
12 – Z-Zigzag stitch: For sewing backtacks at strap points as well as other areas that need reinforcement. I set the stitch width to 1.8 and length to 2.0
ADDITIONAL FEATURES
LIGHT: I have good vision, but after a full day of sewing, my eyes get tired and heavy. The brightness of the LED lights on the creative icon™ have become so helpful, especially if I’m using Superior Threads Bottom Line thread (check out this blog post for my favorite bra making tools!). You can see exactly what’s going on, the stitch quality, the tension, etc. If I switch to another machine at the studio, even if it’s at the beginning of the day, I’m bound to switch back so that I can see better. Also, the positioning of the lights has been well thought out – there are no shadows. So nothing gets hidden.
SCREEN: Measuring 10.1”, the creative icon™ large color, touch screen functions very much like a tablet. When I am in embroidery mode, I can pinch, zoom and edit each stitch in an embroidery design. Even if I have created it in Premier+ 2 Embroidery, I can edit it right in the machine. Neat-oh!
CONNECTIVITY: When connected to WiFi, the creative icon™ will send real time alerts (like when there’s a firmware update), and status updates on your projects when you’re on the go if you have the app downloaded. I found this most useful with I created this daisy motive using Premier+ 2 Embroidery on my home computer and literally sent it to my machine at the studio. The next day, I just loaded it and started embroidering! Check out this video tutorial on how I sent the project to my sewing machine.
SOUND: Before trying out any features or special stitches, this is usually the first comment someone makes after sewing on a PFAFF. “It’s so quiet and smooth!” – I estimate that statement comes out of 90% of people mouths and I back it up 100%. It’s not a loud machine and it won’t shake and dance around your sewing table if you start to sew fast.
IDT: I can’t write a post about PFAFF and NOT mention their IDT system. IDT, say what? It stands for Integrated Dual Feed System. Basically, it’s a built in walking foot that gives controlled, no-slip sewing. It helps fabric feed evenly from the top and the bottom so that pieces match up, don’t stretch out, and line up perfectly… yippee! For sewing lingerie, this is important. Two words: game changer.See that little black contraption at the back of the presser foot? That’s the IDT and when you get the machine, all you have to do is press it down to engage it. No tools, no extra assembly. It comes standard with the machine. Come on, how easy is that? And the creative icon™ will tell you if and when you don’t have to use it.


