Click here to shop the entire Hot Girl Bridgerton Collection!
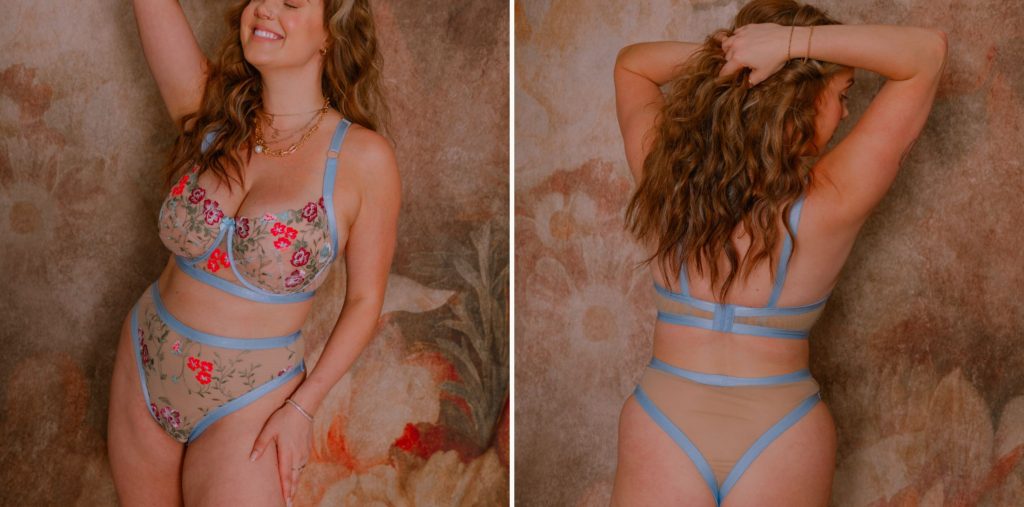
I was so excited when the fabric mill said they could produce an all over embroidered tulle lace *and* a galloon embroidered tulle lace that would match! This not only makes cutting the Rey underwire bra and the Millie panty a breeze, but a beautiful two-piece set!
Rey Underwire Bra: This is a variation of the underwire bra from Madalynne’s book, Sew Lingerie, that has fold over elastic as the underwire casing and no wide band elastic at the bottom.
Top Bra Cup: One layer of non stretch galloon lace. Cut out and sewn as per instructions.
Lower Bra Cups: One layer of non stretch galloon lace and one layer of sheer cup lining. Cut out and sewn as per instructions.
Frame: One layer of all over embroidered tulle lace and one layer of sheer cup lining.
Back Band: Two layers of stretch mesh.
*Click here to watch tutorial/IG reel on how to sew fold over elastic as underwire casing.
*Since there is no wide elastic band at the bottom of the bra, you will have to adjust the width of the back band at the center back so that it fits into the hook + eye.
Millie Panty: You could use several Madalynne patterns for the matching thong. The panty in the photos is the Millie, but the Tonika, Buffy or Odessa could be used.
Front Panty: One layer of all over embroidered lace lined with one layer of stretch mesh.
Back Panty: One layer of stretch mesh.
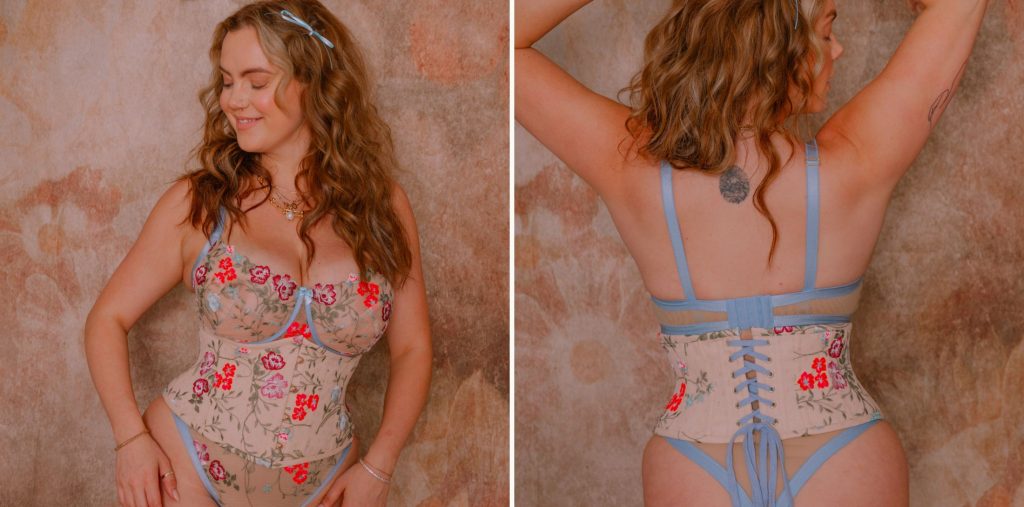
How pretty is this Annette waspie worn with the Rey underwire bra and the Millie panty! The only change from the instructions is to spray baste the all over embroidered tulle lace to the coutil brocade prior to cutting out the pattern pieces, even the bias binding. The all over embroidered tulle lace reduced the stretch on the bias bindings, but because the edges on the Annette aren’t super curved, there were no issues when sewing.
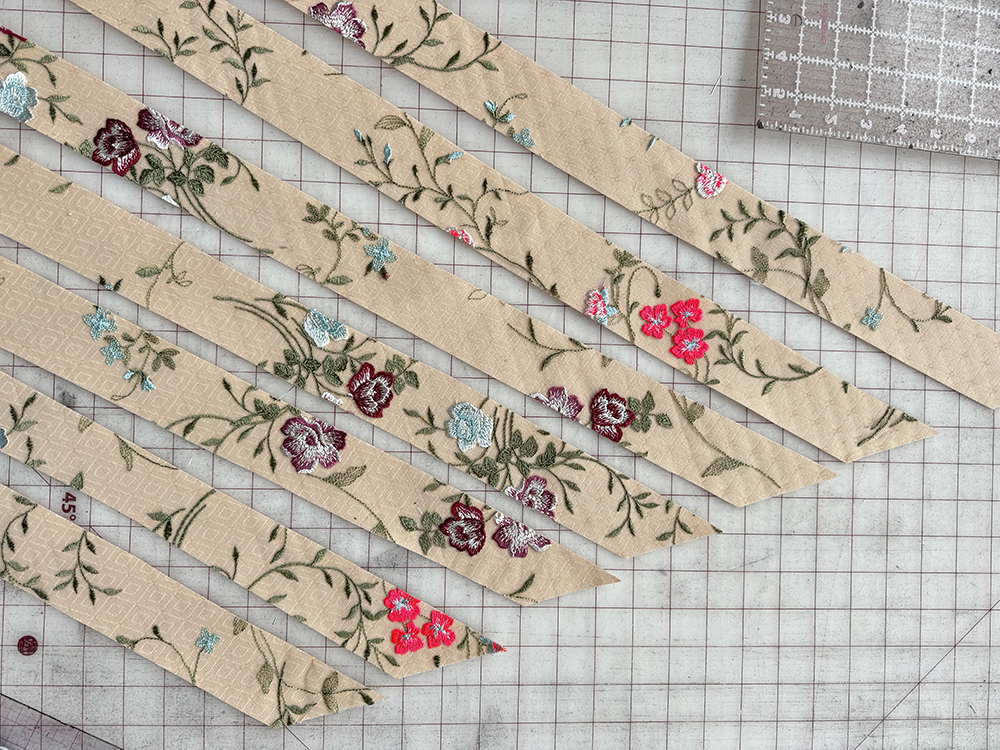
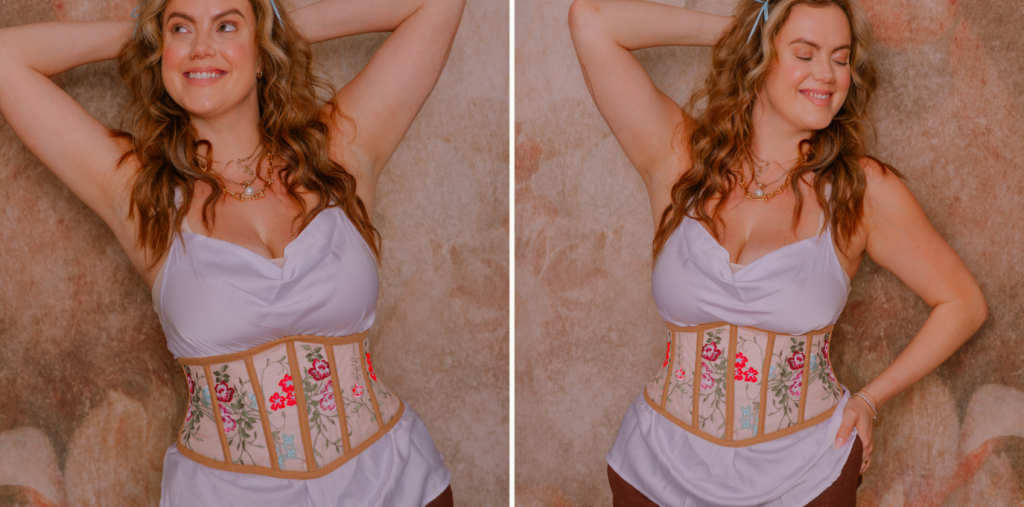
This Annabelle waspie has almost the same change as the Annette above – to spray baste the all over embroidered tulle lace to the corset mesh prior to cutting out the pattern pieces, but *NOT* the bias binding. The bias binding is only coutil.
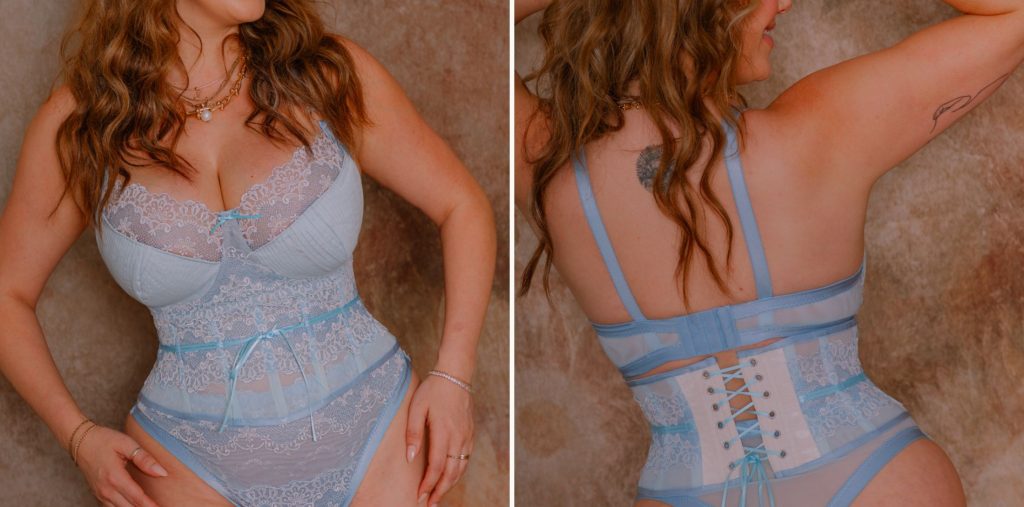
Rey Underwire Bra: This is a variation of the underwire bra from Madalynne’s book, Sew Lingerie, that has pre-pleated lower bra cups made with cotton poplin and no wide band elastic at the bottom.
Top Bra Cup: One layer of non stretch galloon lace. Cut out and sewn as per instructions.
Lower Bra Cups: One layer of sheer cup lining and one layer of cotton poplin that has been pre-pleated (pin tucks) using this tutorial.
Frame: One layer of non stretch galloon lace and one layer of sheer cup lining. The galloon edge is on the bottom edge. Before sewing the frame to the back band, finish the bottom edge with picot elastic (sewn flat on the wrong side).
Back Band: Two layers of stretch mesh. Bottom edge is finished with fold over elastic before sewn to the frame.
Millie Panty: You could use several Madalynne patterns for the matching thong. The panty in the photos is the Millie, but the Tonika, Buffy or Odessa could be used.
Front Panty: One layer of the non stretch galloon lace lined with one layer of stretch mesh. We pieced it together using this tutorial so it would fit on the pattern. The scallop lace edge is along the top edge (waistline), so before sewing the front panty to the back panty, finish the top edge with picot elastic (sewn flat on the wrong side).
Back Panty: One layer of stretch mesh.
Annabelle Waspie: This is such a fun variation of the Annabelle!
One: First, spray baste white corset mesh to light blue stretch mesh. Then, cut all pieces except for the center back. After, cut the center back out of off white stabilized satin.
Two: Cut two strips of non stretch gallon lace. The length should be the slightly longer than the waspie. The width depends on how wide you want the lace overlay to be. Sew the two strips together. Press seams open and then lay on top (right side) of all Annabelle pattern pieces except for the center back. The seam on the lace strip should align with the waistline. Pin in place. Then cut the lace strips for each pattern piece.
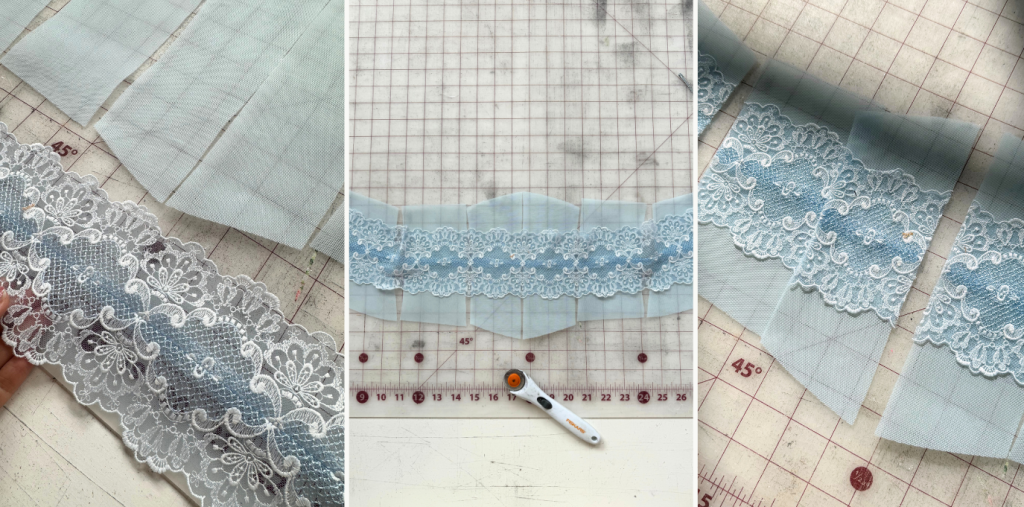
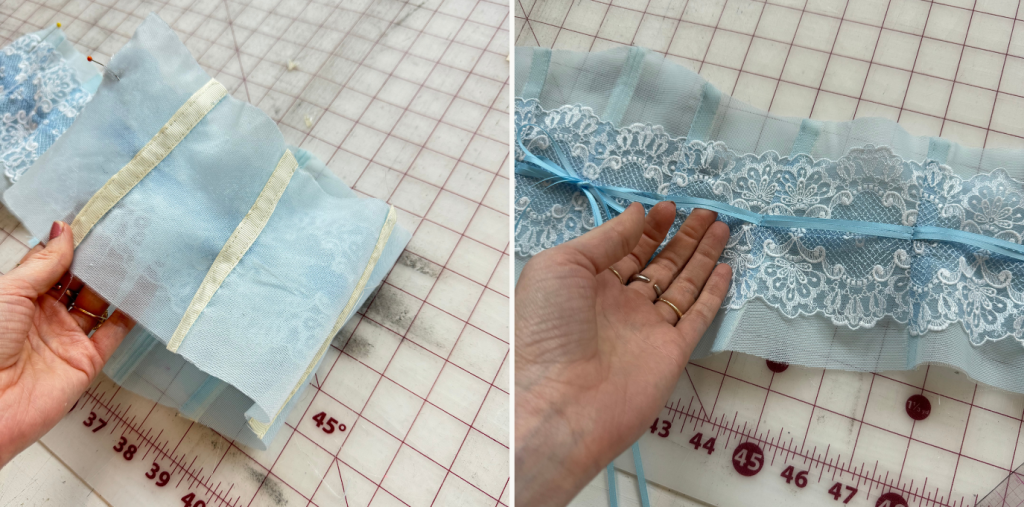
Three: With right sides together, sew all panels along the vertical seams except for center back (please note that I did not sew down the lace strips prior to this step, but if you prefer to, you can). Then, sew the boning channels as per the instructions. For this DIY kit, the boning channels were satin or grosgrain ribbon.
Once boning channels are attached, lay two strips of ribbon on the right side of the corset. They should align with the waistline. Sew down with a straight stitch (bar tack) right next to each vertical seam. So the ribbon is ‘free floating’ in between the vertical seams. Tie in a bow at the center front.
Once the ribbon is attached, then sew the center back panel and attach the boning channels.
*Because the Annabelle is sheer, plastic boning is included in the DIY kits to prevent boning from showing through.
Four: Proceed with sewing the Annabelle per the instructions. Please note that the binding for the top and bottom edges is ⅜” fold over elastic, which is usually used for lingerie. Since this Annabelle variation is being styled with a Rey underwire bra and Millie panty, lingerie elastic was used as binding.
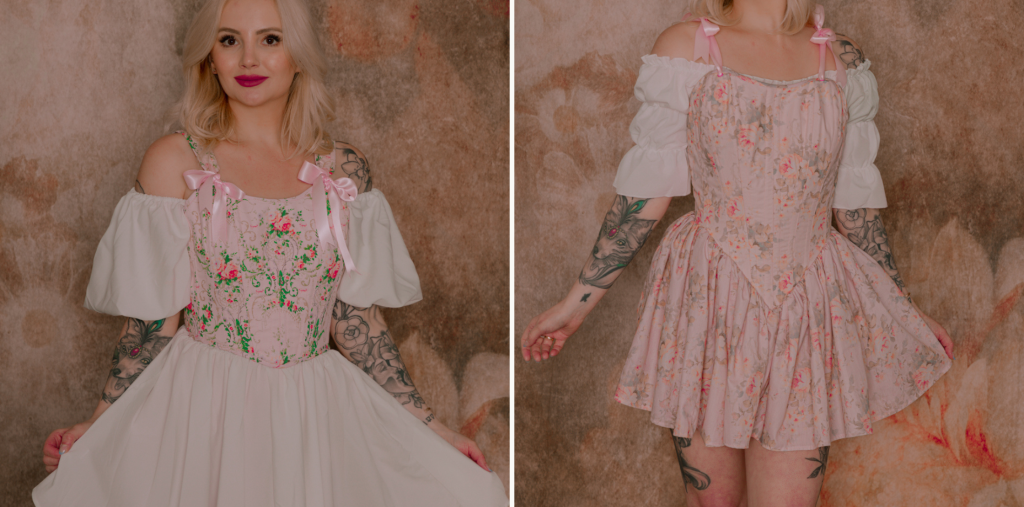
Can we take a moment – okay, maybe a sentence – to gawk at the prints on these Madalynne X Simplicity S9974 corset kits?! Obsessed. Both patterns were designed in-house and play into a vintage and Rococo theme. The reason they were printed on cotton was because the fabric needed to be light enough to gather into a skirt, but also pair well with coutil, which is the lining/stretch layer for the bodice. For these kits, there are very minor variations to the original pattern.
Shoulder tabs: In the top right image, satin ribbon is used as the shoulder straps for the dress and are tied in a bow at the shoulder.
Lace Trimming: Included in the pink Rococo kits is white non stretch lace trimming that is meant to be sewn to the hem of the skirt (if you ordered the dress add on).
*The S9974 dress pattern calls for a rope to be sewn at the seam connecting the bodice and the skirt. This is optional and a rope is not included in the DIY kits.
*The S9974 pattern calls for 12 spiral steel boning, however, each DIY kit comes with a range of 20 different lengths to accommodate different sizes as well as alterations you may make while sewing.
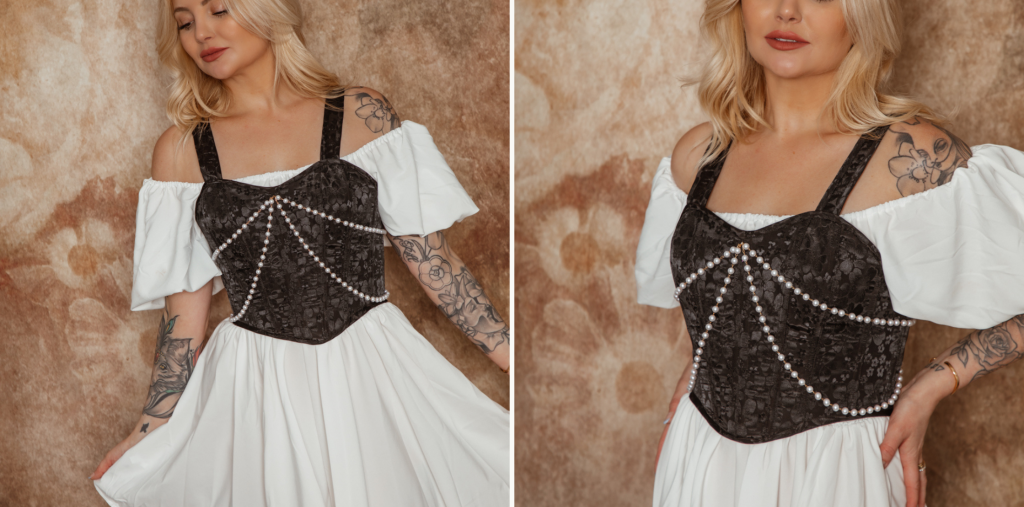
This S9974 kit this is for the person who doesn’t like pastel colors and patterns and wants something monochrome. Black is always the new black, right? Just like the previous s9974 DIY kits, there are only minor variations to the original pattern:
Shoulder tabs: Shoulder tabs are sewn directly to the bodice at the neckline.
Pearl Chain: Pearl chain included in the DIY kit are sewn on directly to the fabric by hand with a needle and thread. I recommend to try on the corset top after it has been completed and drape the pearl chain to get the correct length. You may want only a single stand on either side or double. It’s up to you! Once you get the length figured out, cut the chain using a pair of scissors or small wire cutters. Then sew to the corset top through all layers.
*DIY kit was only for the S9974 top only (not the dress)
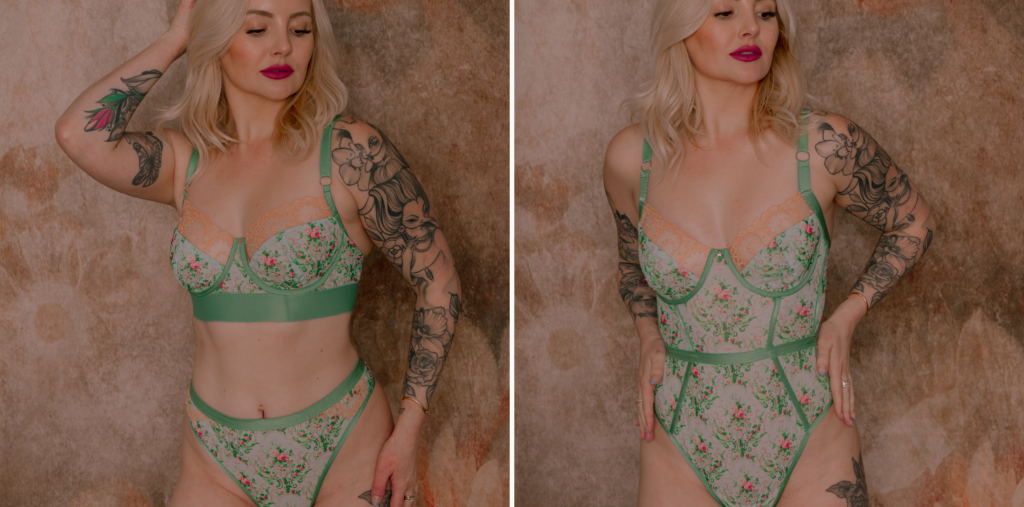
Isn’t the sage color of these Rey underwire bra, Millie panty, and Godiva bodysuits gorgeous? Again, only minor variations for these three kits:
Rey Underwire Bra: This is a variation of the underwire bra from Madalynne’s book, Sew Lingerie, that has fold over elastic as the underwire casing.
Top Bra Cup: One layer of non stretch scallop galloon lace. Cut out and sewn as per instructions.
Lower Bra Cups: One layer of printed stretch mesh and one layer of sheer cup lining. Cut out and sewn as per instructions
Frame: One layer of printed stretch mesh and one layer of sheer cup lining.
Back Band: One layer of printed stretch mesh and one layer of regular stretch mesh.
*DIY kits include plush underwire channeling, but the bra in the product photos use narrow fold over elastic. Click here to watch tutorial/IG reel on how to sew fold over elastic as underwire casing.
Millie Panty: You could use several Madalynne patterns for the matching thong. The panty in the photos is the Millie, but the Tonika, Buffy or Odessa could be used.
Front + Back Panty: One layer of the printed stretch mesh lined with one layer of stretch mesh.
Lace Side Panel: Non stretch scallop galloon lace
Godiva Bodysuit: This is a variation of the bodysuit from Madalynne’s book, Sew Lingerie, that has fold over elastic as the underwire casing, wide fold over elastic used as the waistband, and eliminates much of the lace overlay.
Top Bra Cup: One layer of non stretch scallop galloon lace. Cut out and sewn as per instructions.
Lower Bra Cups: One layer of printed stretch mesh and one layer of sheer cup lining. Cut out and sewn as per instructions
Frame: One layer of printed stretch mesh and one layer of sheer cup lining.
Back Band, Front Panty + Back Panty: One layer of printed stretch mesh and one layer of regular stretch mesh.
*DIY kits for the Godiva include a wide elastic waistband, but the bodysuit in the product photos use a wide fold over elastic was used. This is optional.
*Only the top bra cup of the bodysuit uses a non stretch scallop galloon lace. The patterns calls for more and that is because it is used as a decorative overlay. Since the printed mesh (main fabric) is so pretty, we didn’t want to cover it up with lace. So the DIY kits only include enough lace for the top bra cups.
*DIY kits include plush underwire channeling, but the bodysuit in the product photos use narrow fold over elastic. Click here to watch tutorial/IG reel on how to sew fold over elastic as underwire casing.

