A Guide To Sewing Madalynne Swimwear
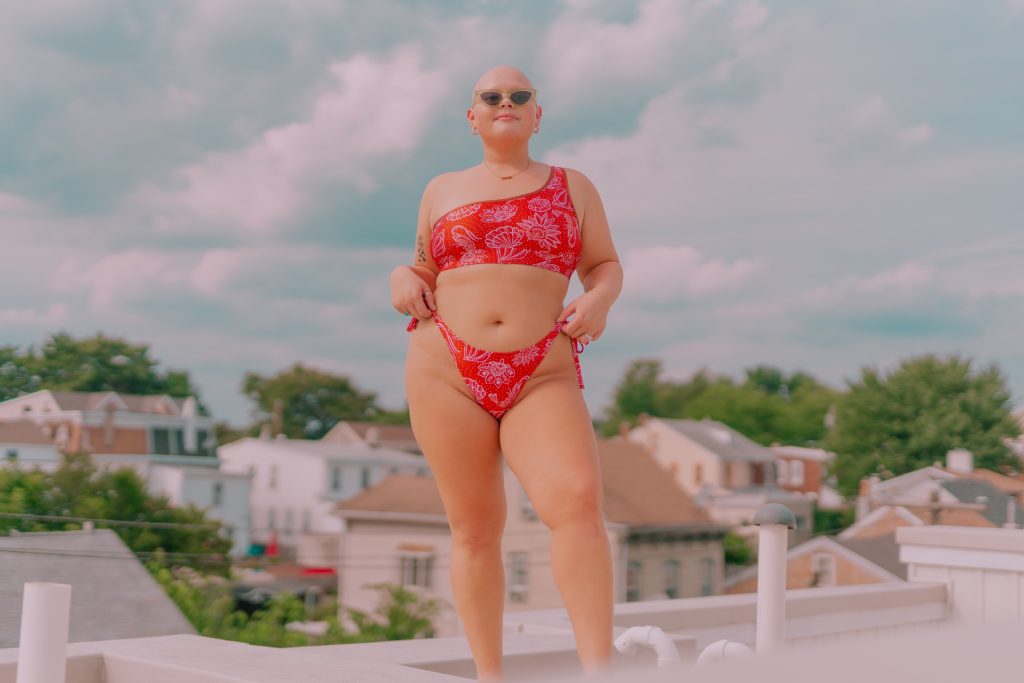
It’s here, it’s here! After many months of being inside during winter, my favorite season is finally here. Being from Florida, I live for the heat and *slight* humidity. Just a touch, but not enough to make my hair frizzy. Priorities folks. The time in between Memorial Day and Labor Day is my favorite – late sunsets, steamy runs in the morning, grilling… and bikinis! Or one-pieces if that’s your jam. Below is a brief rundown on how to sew Madalynne me-made swimwear. Keyword is brief. The directions are very simple and assume that you have sewing knowledge and/or have made Madalynne’s patterns before. Also, these instructions are specifically related to DIY kits, but if you want to know more about DIY swimwear in general, sign up for Madalynne’s Intro to Sewing Swimwear virtual class, linked below.
Shop all Madalynne’s DIY swimwear kits
Sign up for Madalynne’s Intro to Sewing Swimwear virtual workshop
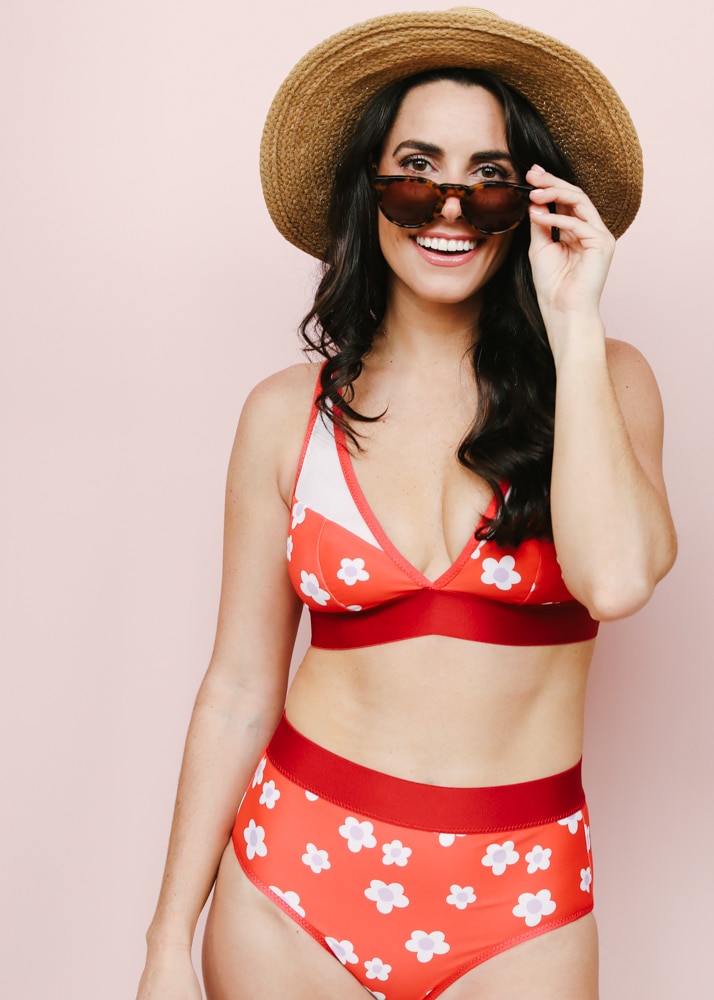
MARIS BIKINI
The Maris DIY kit uses the Maris bralette as a bikini top and the Noelle panty as a bikini bottom.
PATTERN ALTERATIONS
MARIS BIKINI TOP: No, and I repeat, *no* pattern alterations are needed for the Maris bikini top. Cut out main fabric and lining fabric per the instructions.
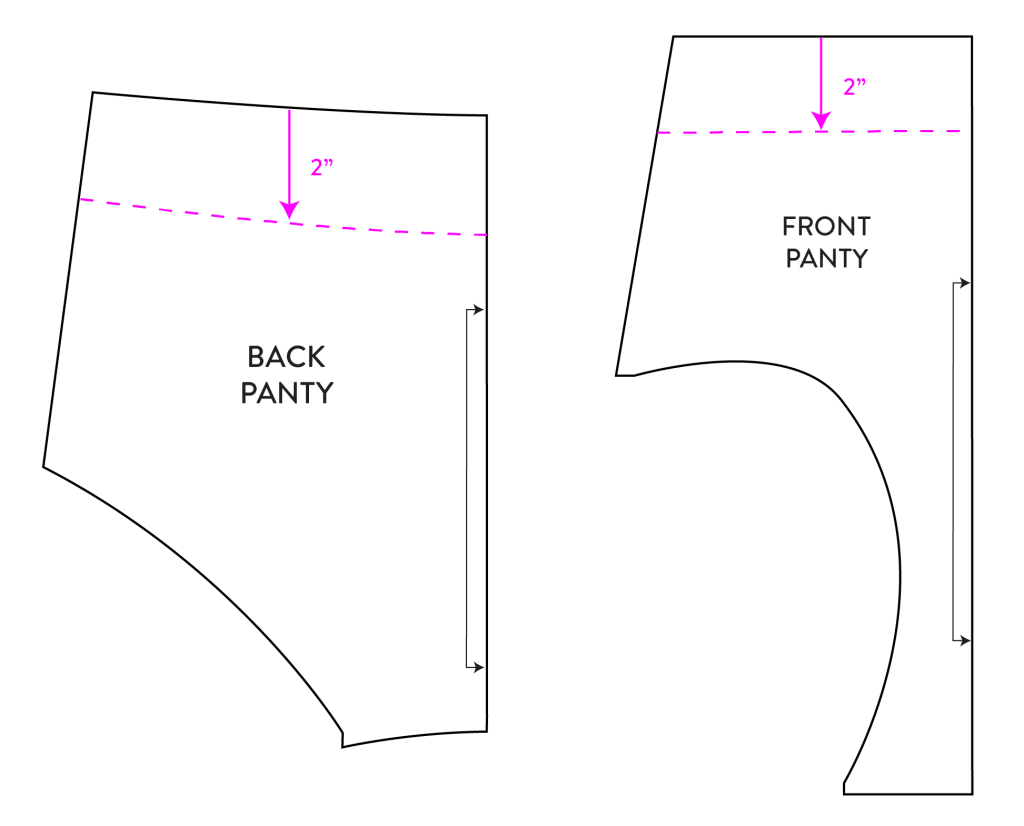
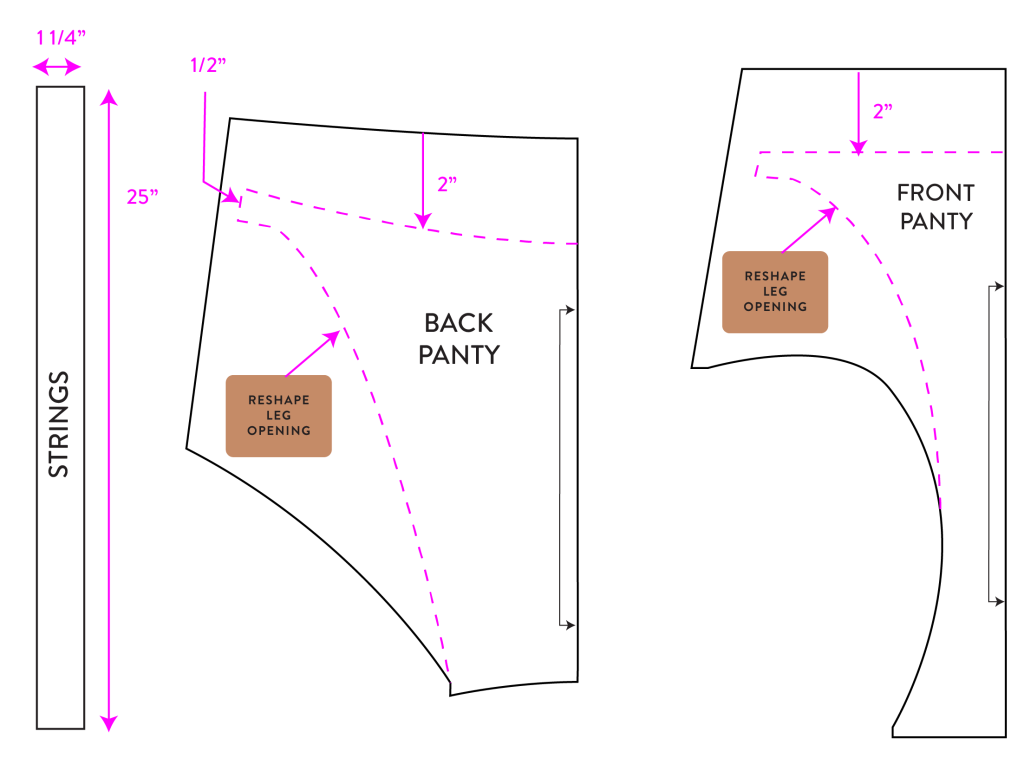
NOELLE BIKINI BOTTOM: While I love the Maris panty, I ain’t wearing a thong to the beach or pool. lThe Noelle is the perfect alternative. There is only 1 pattern alterations – lowering the waistline to account for the wide elastic band . An optional alterations is to remove the seam allowances from the leg openings to account for fold over elastic (the panty is sewn with picot elastic).
SEWING CHANGES
MARIS BIKINI TOP:There are only 2 small changes to sewing the Maris bikini. The first is super simple – eliminating the channeling and the plastic boning at the side seam. The reason being is that generally, swimwear has a more relaxed fit. If you want your swimsuit to have structure and support, then by all means, keep it!
The other change are the bikini straps. The kits come with clear elastic to make your own and I followed this tutorial by Evie La Luve (the 2nd method) to create them. If you have enough fold over elastic left in your kit, you could encase it with clear elastic and use it as straps. IMHO, self-made swimwear straps are not only a pain to make, but they are less supportive than regular shoulder strap elastic used for lingerie. So, if you feel that you need the support, if you’re having a lazy sewing moment, or if you’re not going into the ocean or pool much, it’s okay to use lingerie shoulder straps for swimwear.
The fold over elastic binding and the wide elastic bands in Madalynne kits are a blend of polyester and polyurethane that’s are suitable for lingerie and swimwear. A lot of lingerie fabrics are made with a blend of nylon and Spandex. Nylon has better stretch, so it gives a “less tightness” feel on the body, but polyester is a more durable fiber and has better resistance to chlorine. So that means you don’t have to make your own binding or have a coverstitch machine. Woo hoo!
The same goes for the barrel closure (which is optional) and rings + sliders included in kits. They are suitable for swimwear.
NOELLE BIKINI BOTTOM: Easy peasy. Sew the side seam and crotch seam. Then attach the wide elastic at the waistline and fold over elastic at the leg openings.
Crotch lining/gusset: What about crotch lining? First thing first – do not use cotton jersey. Cotton absorbs and retains water and the last thing you want is for your hoo-ha to be *moist* all day long. You can use fabric for a gusset, but I prefer to eliminate it completely. It can get bulky and I have seen RTW swimsuits without any gusset or crotch lining.
FOAM CUPS: Lining adds a little modesty, but you could still have “nipple show through”, especially if the swimsuit gets wet. Or maybe you want a little padding to give you a better shape. Enter polylaminate foam. Below is a quick tutorial if you want to add polylaminate foam bra cups to the Maris.
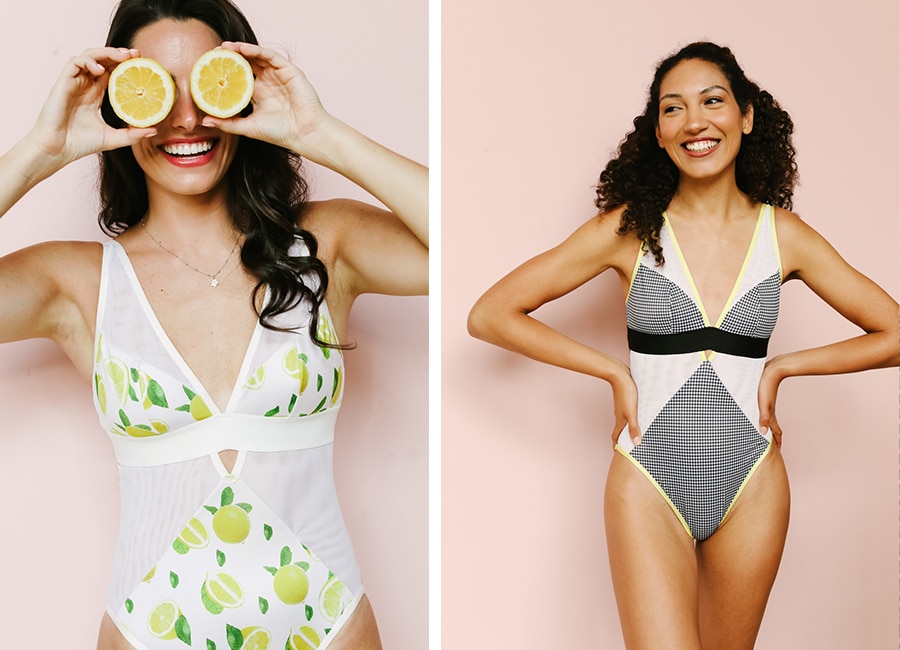
FENIX ONE PIECE
The Fenix DIY one piece swimsuit only uses the Fenix pattern.
PATTERN ALTERATIONS
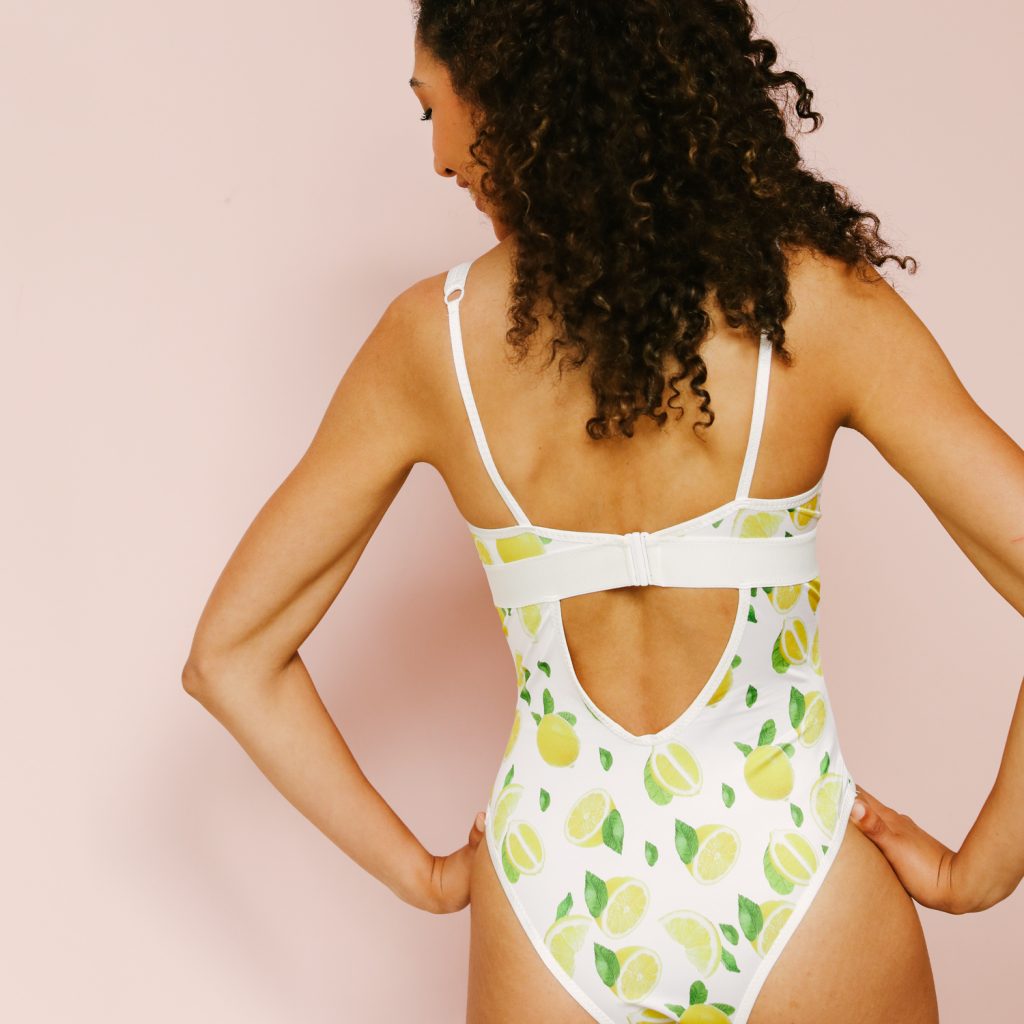
Center back cutout: Changed to a “U” shape to make it easier to sew fold over elastic. Achieving a sharp “V” with FOE can be difficult for some sewists. I simply rounded the bottom of the “V”. I didn’t use any math or calculations. You can make the “U” shape longer or wider if you want.
SEWING
Fold over elastic: On the Fenix bodysuit, picot elastic is sewn to the center front cut out. On the Fenix one piece, fold over elastic is sewn instead.
The fold over elastic binding and the wide elastic band are a blend of polyester and polyurethane and suitable for swimwear. A lot of lingerie fabrics are made with a blend of nylon and spandex. Nylon has better stretch, so it gives a “less tightness” feel on the body, but polyester is a more durable fiber and has better resistance to chlorine. So that means you don’t have to make your own binding or have a coverstitch machine. Woo hoo!
The same goes for the center back barrel closure and rings + sliders. Both are plastic and suitable for swimwear.
Center back closure: The only change to sewing is at the center back. The Fenix bodysuit calls for a 3×3 hook and eye. On the Fenix swimsuit, the hook and eye is changed to a barrel closure. It’s the same barrel closure that is used on the Maris bralette.
The 3×3 hook and eye measures 2″ and there is space between the elastic band and the top of the back band. Since the barrel closure is 1 ⅝”, you will have to angle the fold over elastic down and sew it all the way to the bottom edge at the center back. Basically, you’re eliminating that space that is between the elastic band and top of the back band. You could make this pattern alteration, but I like doing this change during sewing so I don’t have two back band pattern pieces.
To sew the barrel closure, feed the elastic band and FOE through the opening, fold it back and then sew with a bar tack (as shown in photo below) or straight stitch.
Shoulder straps: The kits come with clear elastic to make your own and I followed this tutorial by Evie La Luve (the 2nd method) to create them. If you have enough fold over elastic left in your kit, you could encase it with clear elastic and use it as straps. IMHO, self-made swimwear straps are not only a pain to make, but they are less supportive than regular shoulder strap elastic used for lingerie. So, if you feel that you need the support, if you’re having a lazy sewing moment, or if you’re not going into the ocean or pool much, it’s okay to use lingerie shoulder straps for swimwear.
Crotch lining/gusset: What about crotch lining? First thing first – do not use cotton jersey. Cotton absorbs and retains water and the last thing you want is for your hoo-ha to be *moist* all day long. You can use fabric for a gusset, but I prefer to eliminate it completely. It can get bulky and I have seen RTW swimsuits without any gusset or crotch lining.
BELLE ONE PIECE
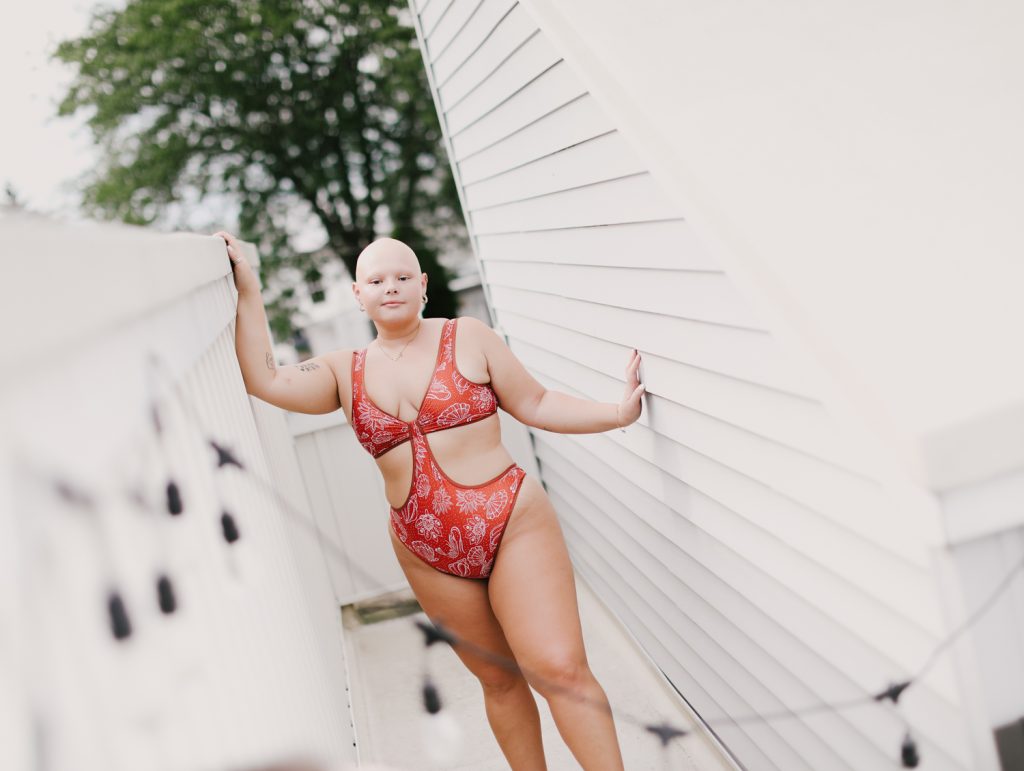
The Belle uses the Roxie sport bralette as the top and the Fenix bodysuit as the bikini bottom.
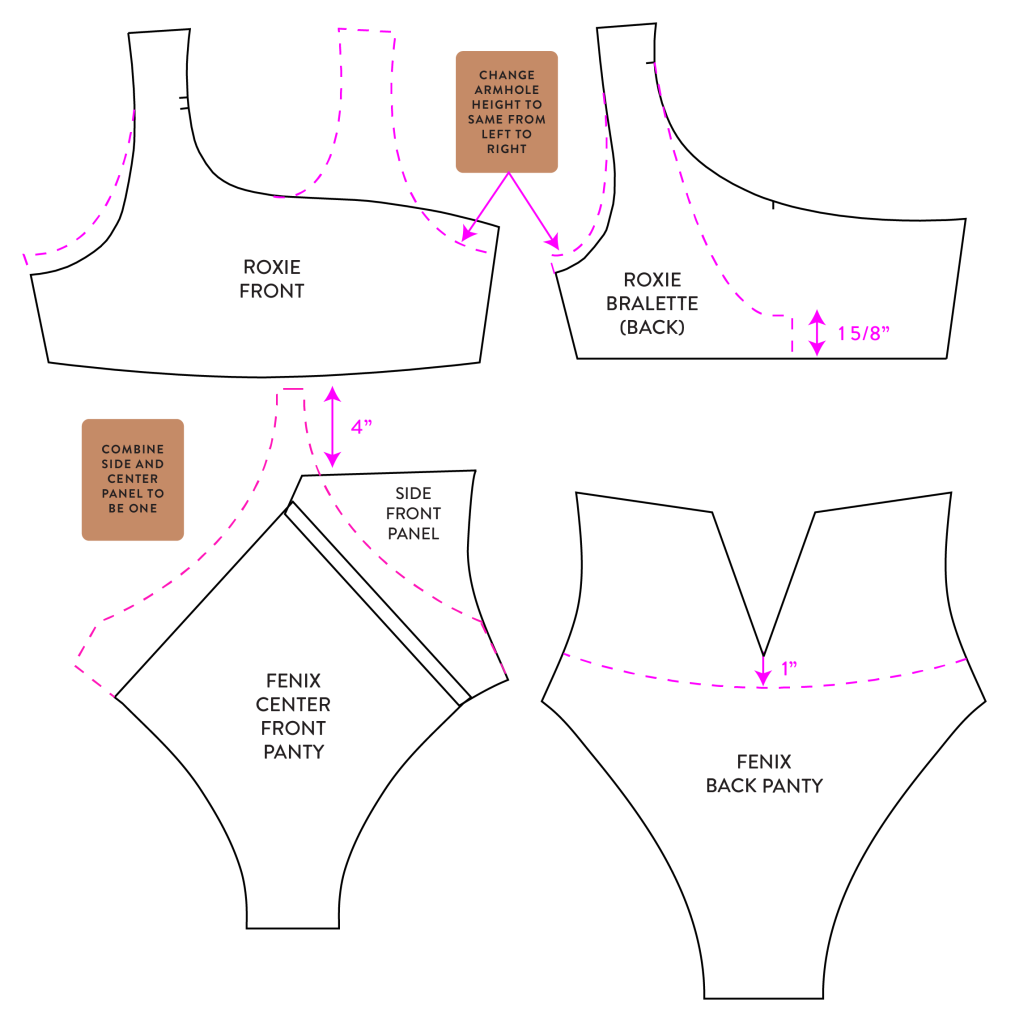
PATTERN ALTERATIONS + SEWING CHANGES: All pattern alterations are shown below. Sewing this variation is super simple and only a couple of steps:
- Sew Roxie front and back together at side seam and shoulder seam. Optional to finish seam allowances with a serge. Attach fold over elastic along all edges.
- Sew Fenix front and back together at side seam. Optional to finish seam allowances with a serge. Attach fold over elastic along all edges.
- Wrap the extension on front panty around the center front of Roxie front. Fold back 2″ and secure it down with a straight stitch. If wrapping it around is difficult, sew a basting stitch and gather the fabric before wrapping it around.
- Attach barrel closure at center back.
ISLA BIKINI
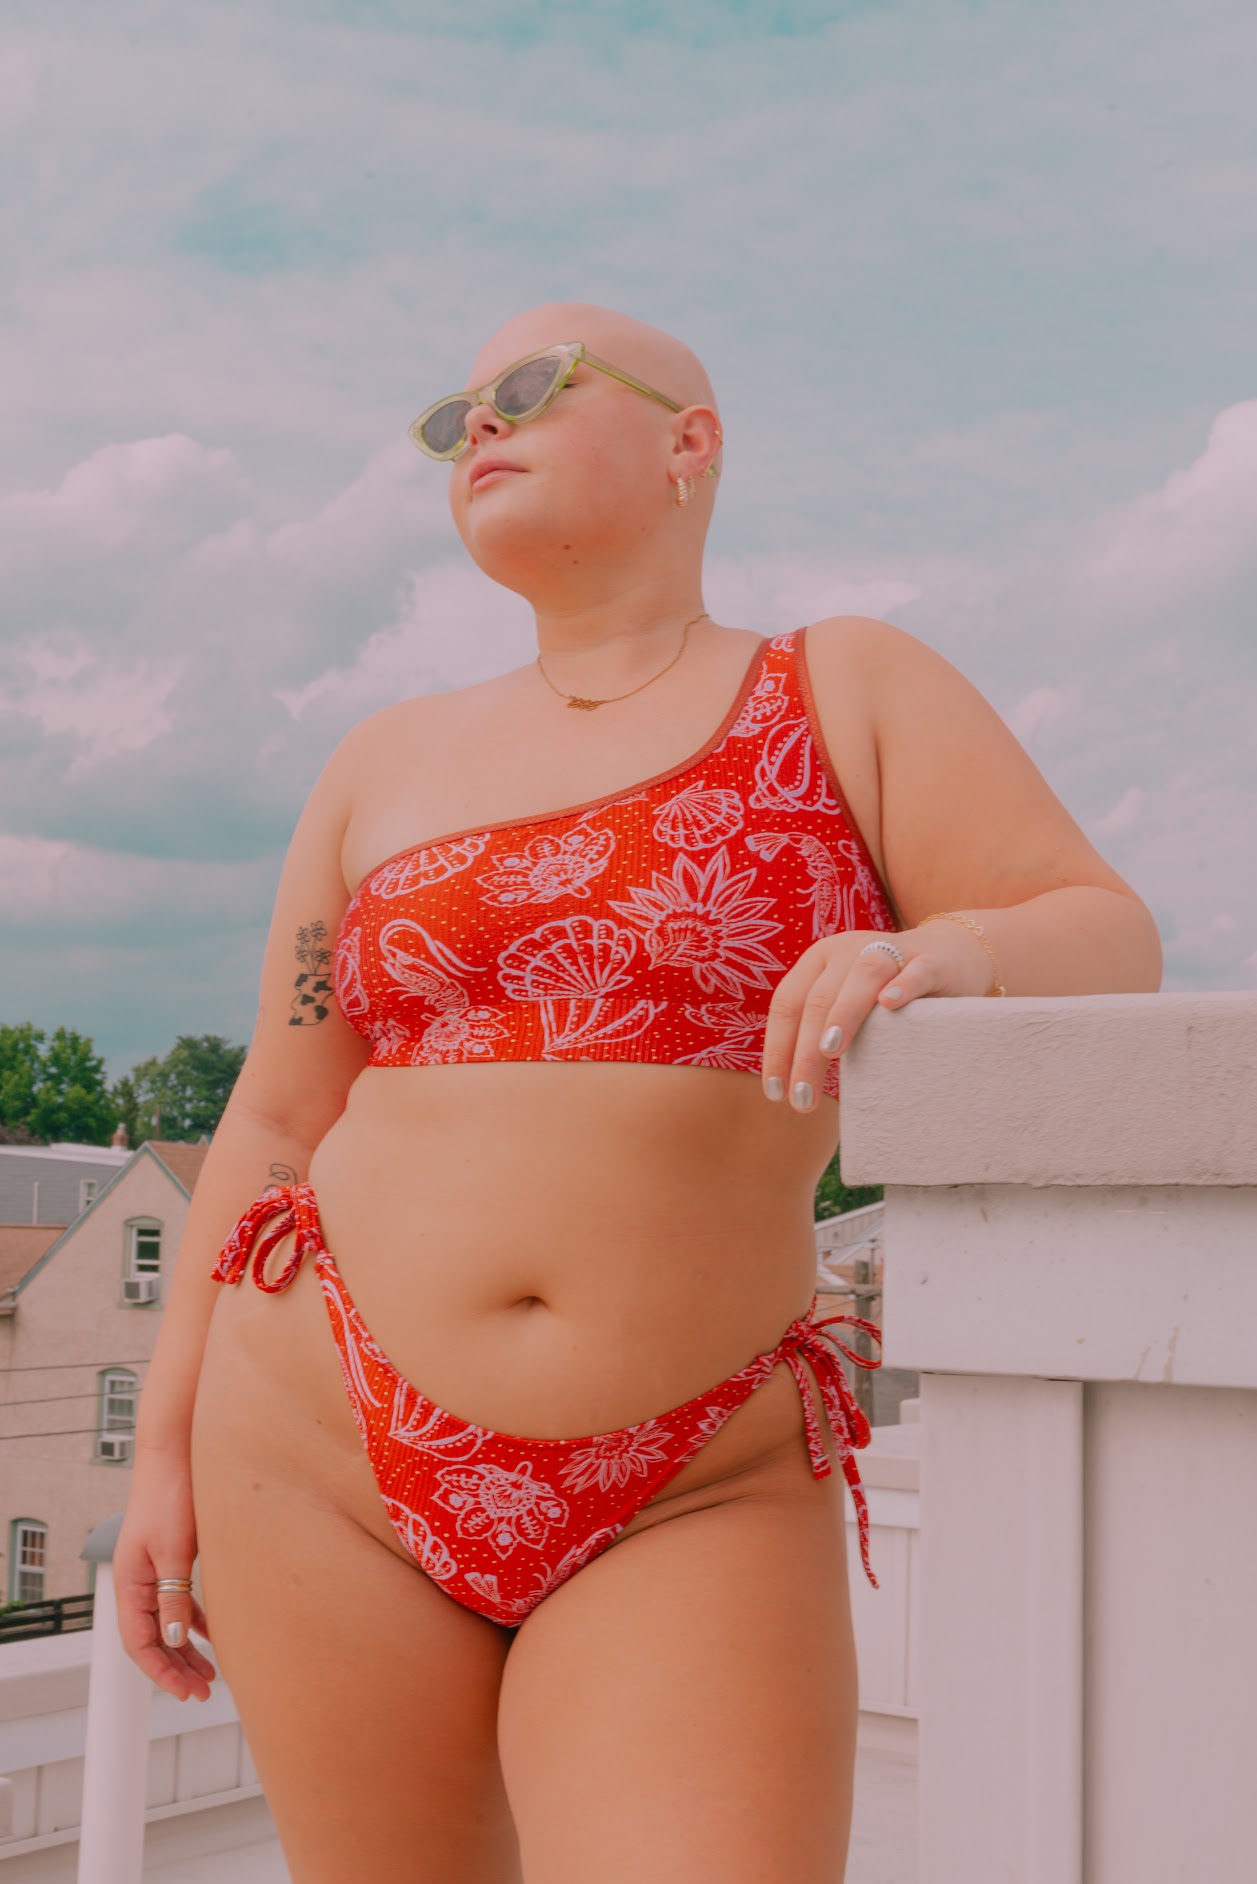
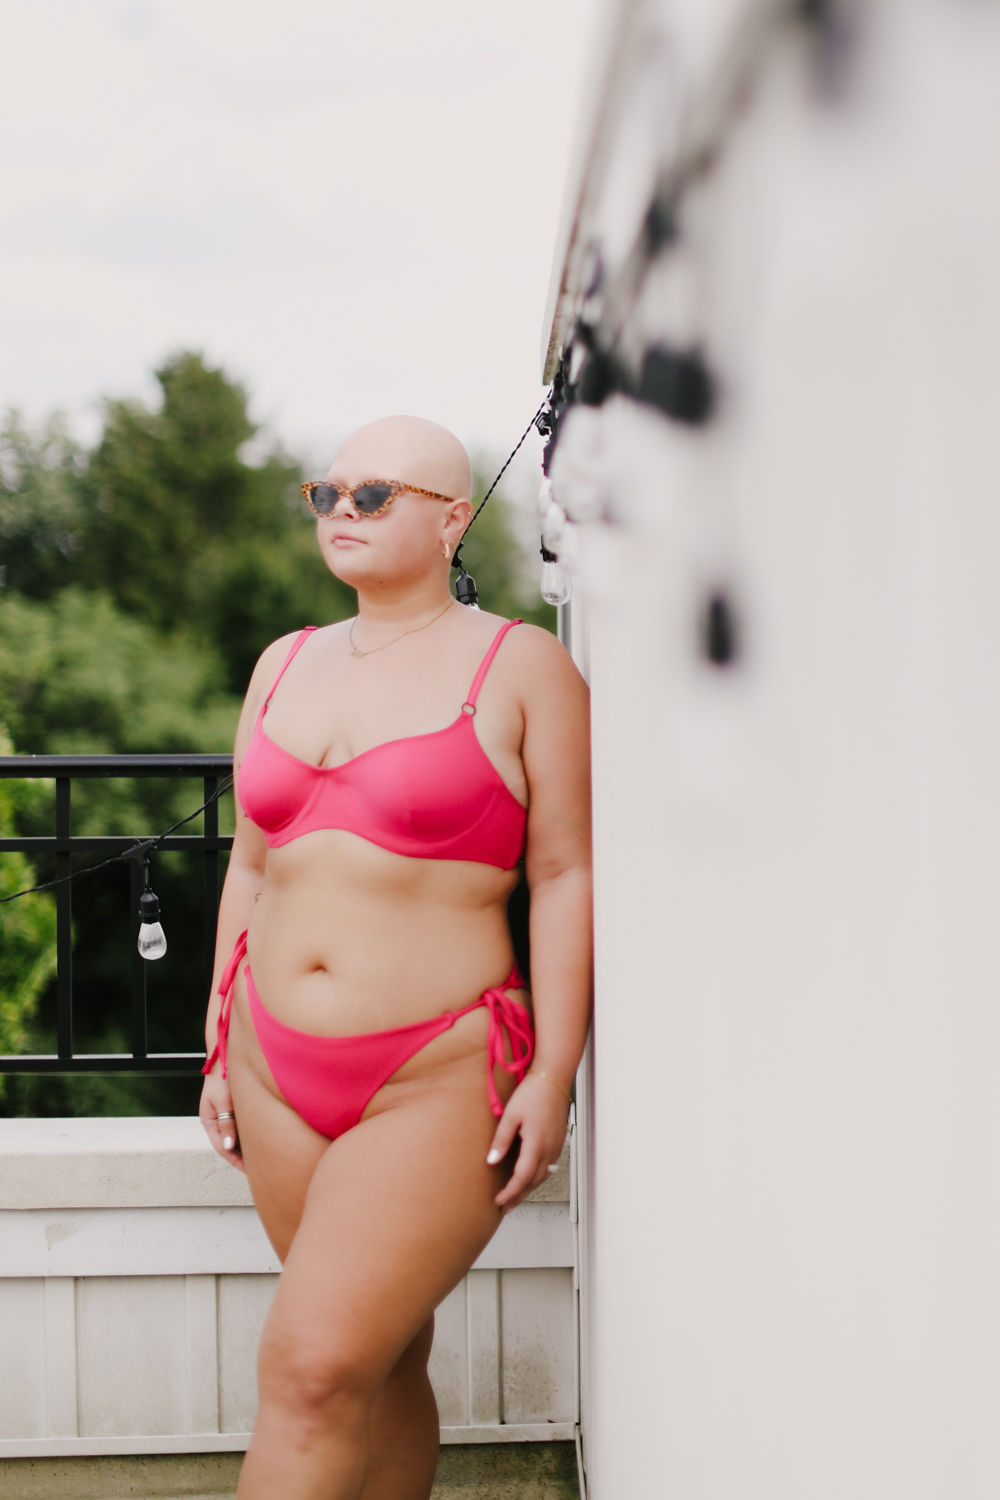
The Roxie bikini top uses the Roxie sport bralette as the top and the Noelle panty as a bikini bottom.
PATTERN ALTERATIONS
Roxie Bikini Top: No pattern alterations except eliminate the front overlay.
Noelle Bikini Bottom: Follow the pattern alterations as shown below.
SEWING CHANGES
Roxie Bikini Top:
- Sew the front and back together at the should seam and side seam. Optional to finish seam allowances with a serge.
- Sew fold over elastic along the neckline and armhole edges.
- Sew encased bottom band per the instructions.
Noelle Bikini Bottom:
- Sew the front and back panels together at the crotch seam. Optional to finish seam allowances with a serge.
- The sew rubber elastic to wrong side of waistline and leg openings with a serge or zigzag stitch. Turn back and sew with a zig zag stitch.
- To make the bikini ties, place rubber elastic on wrong side of fabric with one edge aligned with the right or left edge. Sew down the center of the rubber elastic with a zig zag stitch. Fold rubber elastic back two times and sew down with another zig zag stitch. Fold back one edge and sew down with a zig zag stitch.
- To attach it to bikini bottom, sew together with a straight. Then turn back and sew down again.
QUINN BIKINI
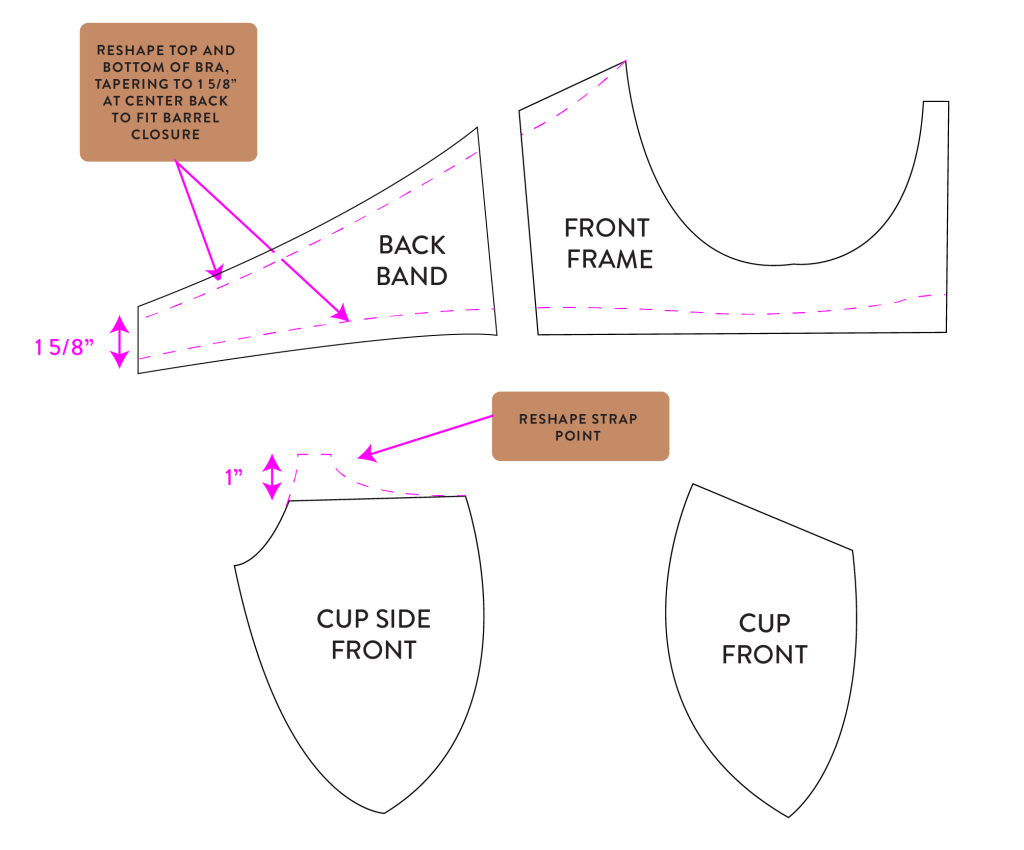
The Quinnn bikini uses the Madalynne X Simplicity 8229 pattern as the bikini top and the Noelle panty as a bikini bottom.
PATTERN ALTERATIONS: Follow the pattern alterations as shown below for the bikini top. Follow the pattern alterations and sewing changes for the Isla for the bikini bottom.
SEWING CHANGES
-
Assemble the bra cups. With right sides facing, sew cup side front and cup front together using a straight stitch. Optional to finish seam allowances with a serge.
-
Sew cups to frame using a straight stitch. The cups should fit with no puckers and no fabric left over; they are not eased in.
-
Sew back band to front frame at the side seam using a straight stitch. Optional to finish seam allowances with a serge.
-
Attach underwire channeling. With wrong side of bra facing up, fold the bra so that the cups and the front band are pointing in one direction and the cup seam allowances are pointing in the other direction. Then place channeling over seam allowance with left edge of channeling aligning with cup seam. Sew channeling to cup seam allowances approximately 1/8” from left channel’s edge. Use a straight stitch and make sure that you’re stitching through seam allowances only.
-
Sew rubber elastic to wrong side of bikini are the bottom edges, top edge and neckline with a zig zag or serge. Turn back and sew with a zig zag stitch.
-
Attach barrel closure at center back.
- Make and attach shoulder straps. The kits come with clear elastic to make your own and I followed this tutorial by Evie La Luve (the 2nd method) to create them. If you have enough fold over elastic left in your kit, you could encase it with clear elastic and use it as straps. IMHO, self-made swimwear straps are not only a pain to make, but they are less supportive than regular shoulder strap elastic used for lingerie. So, if you feel that you need the support, if you’re having a lazy sewing moment, or if you’re not going into the ocean or pool much, it’s okay to use lingerie shoulder straps for swimwear.
PALMER ONE PIECE
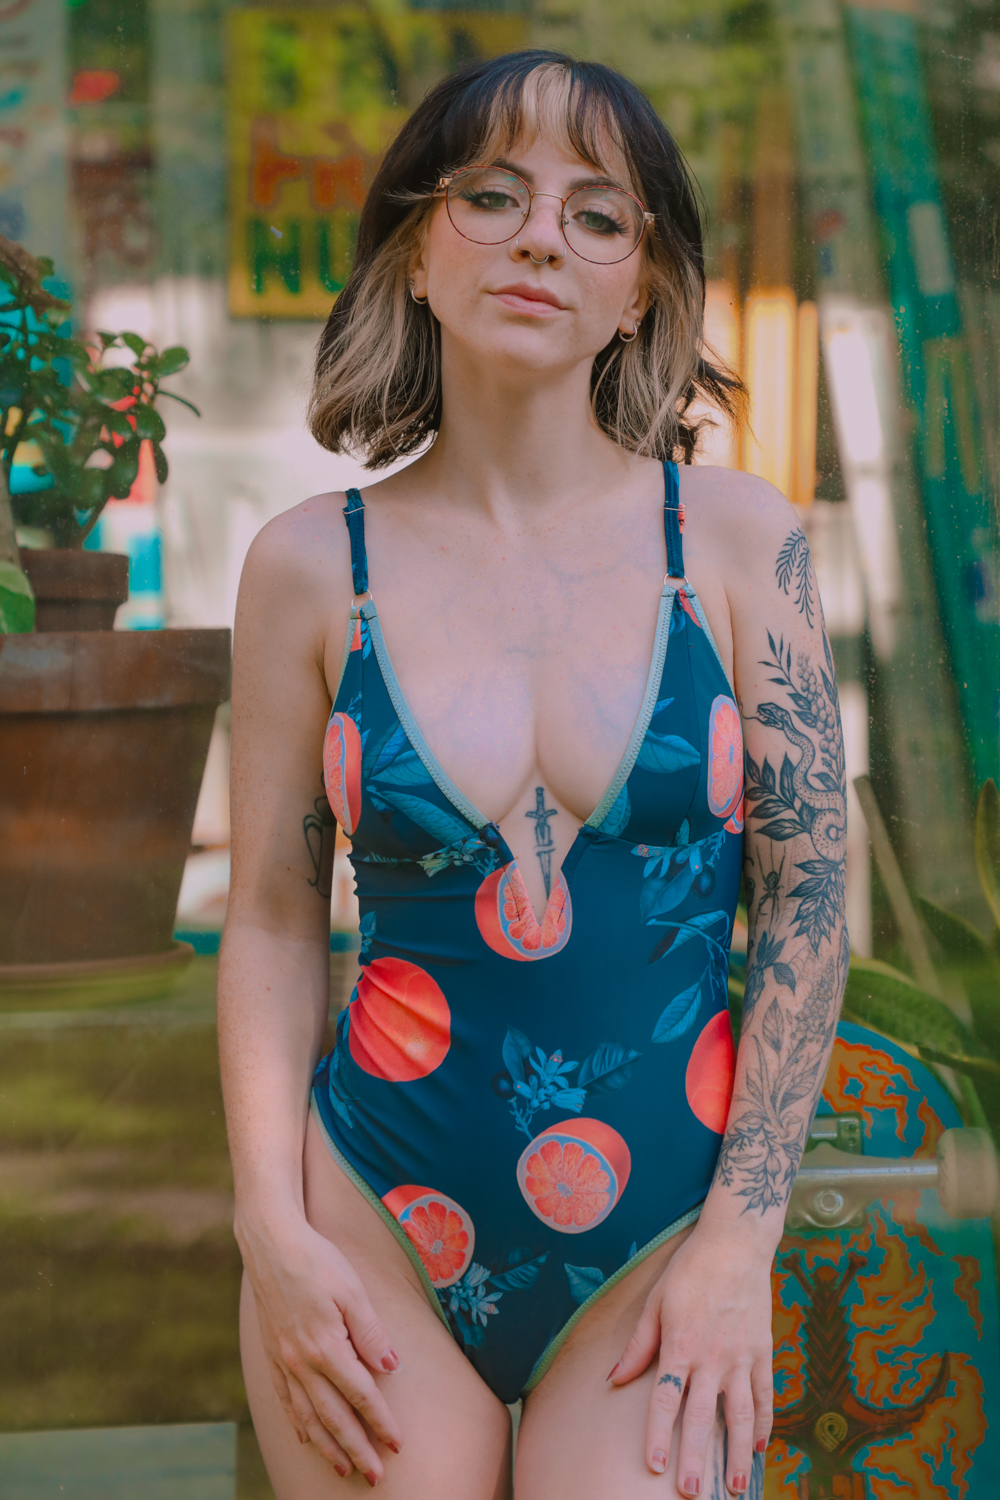
The Palmer one piece uses the Madalynne X Simplicity 9478 pattern as the top and the Lawren and Fenix patterns as the bottom.
PATTERN ALTERATIONS + SEWING CHANGES: Follow this YouTube tutorial on how to hack the S9478, Fenix and Lawren patterns and sewing instructions. Instead of finishing with picot elastic, use fold over elastic along all edges.


No Comments
Sorry, the comment form is closed at this time.